Introduction
This tutorial demonstrates how to leverage Engyn’s Data, Forms, and Automation features to create a simple yet effective solution for managing business processes. As a practical example, we will guide you through building an OKR tracking system to help your team stay aligned and productive.
What You’ll Learn:
Design and configure a structured data collection system using Forms.
Customize data display formats for clearer representation.
Optimize data management with table view, form view, and split view.
Automate workflows with Engyn’s Automation feature to streamline processes.
Understanding OKRs
OKRs (Objectives and Key Results) are a widely used goal-setting framework that helps teams stay focused and accountable. The process involves three main steps:
Define the Objective – A clear, measurable goal for a team or the organization.
Set a Timeframe – Typically 30 to 90 days to ensure accountability.
Establish Key Results – Measurable targets that contribute to achieving the objective.
In this tutorial, we’ll build a simple OKR tracking system that allows team members to define objectives, assign key results, and track progress.
Let's walk through the steps together:
Step 1: Creating a Form to Collect Objectives
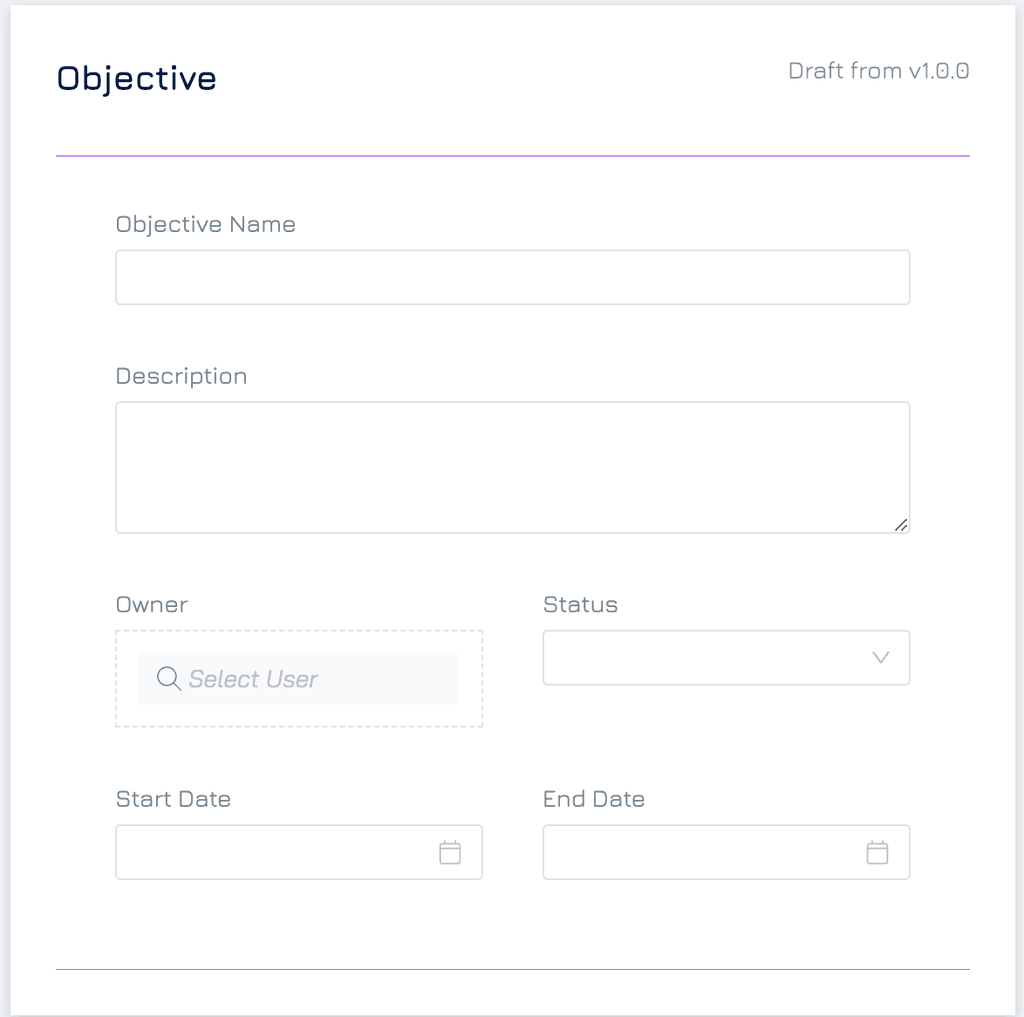
The first step is to create a form for capturing objectives, including objective name, description, owner, completion percentage, and additional notes.
1. Create a New Form
Navigate to Form Design → Click Create Form.
Enter a Title, select Blank, and click Start With This.

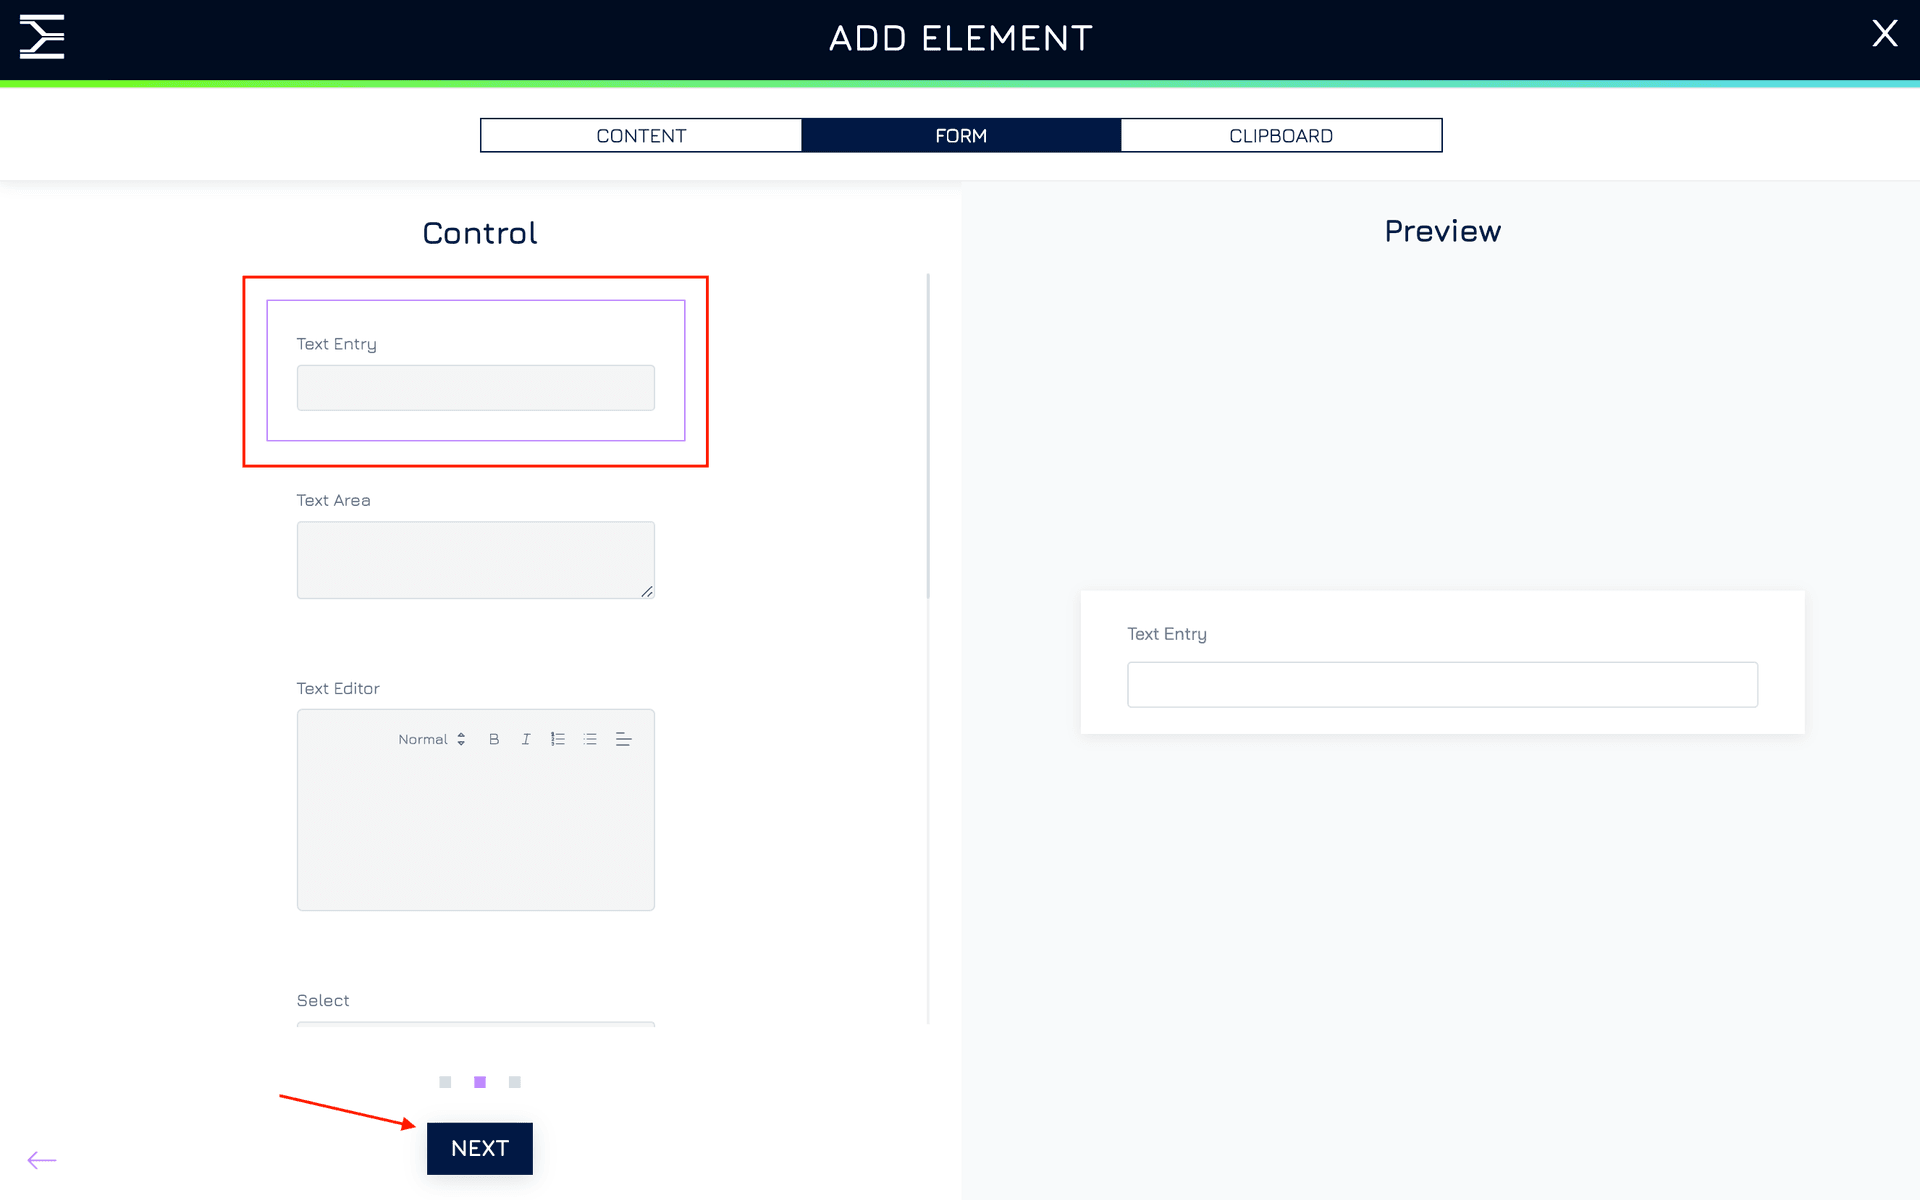
2. Add a Form Control to the Form
Click + to start adding a new property
Click New Property and enter a field name (e.g., “Objective Name”)
Select TEXT data type → Next.
Choose Text Entry form control → Next → Add.
2. Add Remaining Fields
Repeating the above steps to add the remaining fields to the form:
Description (Data type: Text; Control: Text Area)
Owner (Data type: Reference; Control: Single User). This allows the user to select a team member as the objective owner.
Start Date (Data type: Date & Time; Control: Date Picker)
End Date (Data type: Date & Time; Control: Date Picker)
Status (Data type: Text; Control: Select; Available Options: Draft, In Progress, Completed, Archived). This allows the user to choose from the predefined list of available options.
3. Configure the Layout
Drag and drop fields to rearrange them for better organization.
5. Publish the Form
Click Publish → Choose a Form Location.
Select a Data Location.
Click Publish.
My Collection is only for personal use purpose. This means that if you choose My Collection as location for form or data, only you can able to access these items.
Form Library/Share Data are for organization use purposes. This means that if you choose Form Library for form or Share Data for data location, all members have the right permission will able to access these items.
Step 2: Creating a Form to Collect Key Results
To track key results associated with each objective, we’ll create another form.
1. Create a New Form
Follow the same steps as before to create a blank form named Key Results
2. Add a Reference to Objectives
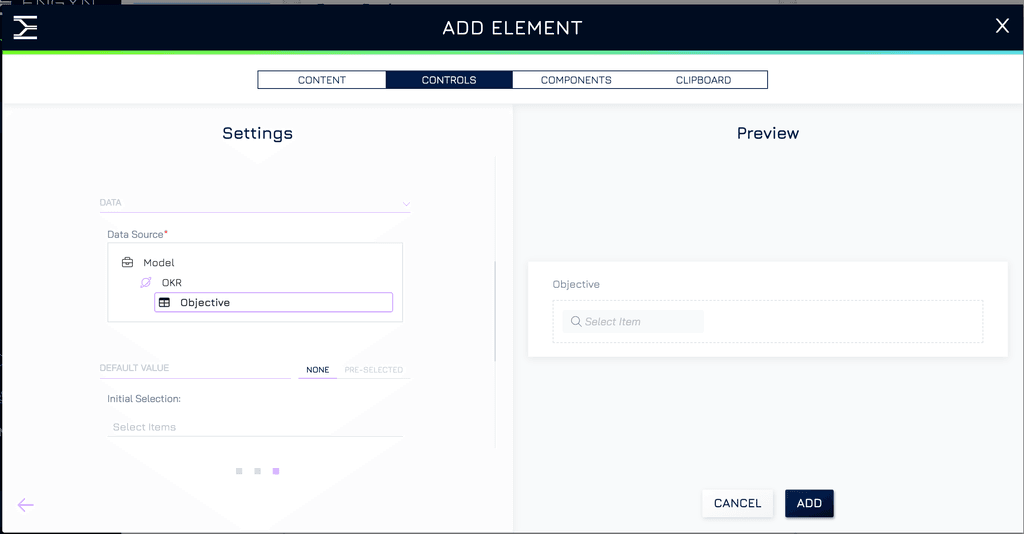
To link the key result with the objectives, add a reference field to this form. This allows users to select an existing Objective when adding key results.
Click New Property and enter a field name: Objective
Select REFERENCE as the data type → Next.
Choose Single Record → Next.
Under Data settings, select Objective (created in Step 1) as the data source
Click Add.
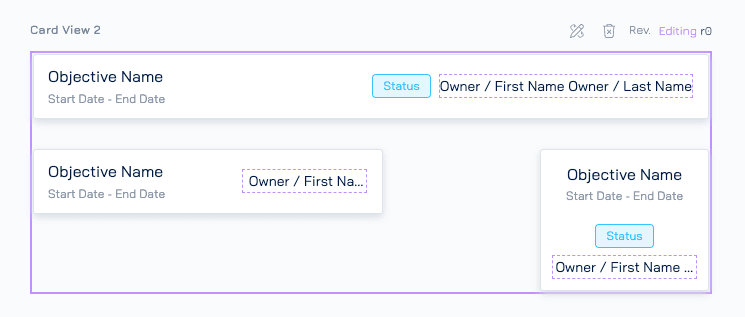
By default, the Objective field appears as a card view in the Key Result form, using the default card layout.
To customize its appearance:
Open the Appearance settings.
Select a different Card View to modify how the Objective field is displayed.
Click Add/Edit Option to create a new view in View Designer.
For example, you can configure the card to display Objective Name, Status, Owner, Start Date, and End Date, as shown below:
3. Add Remaining Fields
Repeating steps 1 - 4 to add the remaining fields to the form:
Title (Data type: Text; Control: Text Entry)
Description (Data type: Text; Control: Text Area)
Owner (Data type: Reference; Control: Single User).
Progress (Data type: Number; Control: Number Entry)
Status (Data type: Text; Control: Select; Available Options: Not Started, On Track, At Risk, Completed).

4. Publish the Form
Repeat the Publish steps from Step 1.
Step 3: Automating the Workflow
To notify assigned team members when a new objective is assigned to them, we’ll set up an automation to send email to them
1. Create an Automation
Navigate to Core → Dataset → Objectives data
Click the ellipsis menu on the top right of the screen → click Automations
Click Add Automation button in Record Added event
Select Engyn → Platform → Send Engyn Email
2. Configure the Email Notification action
Click Subject → Fixed Value → Enter a subject (E.g: New Objective Assigned to You ) → Click Save.
Click Recipients → Select Map Data → Choose Objective Owner Email → Click Save.
Click Content to navigate to the content section
Configure the Body Content using Text Template option
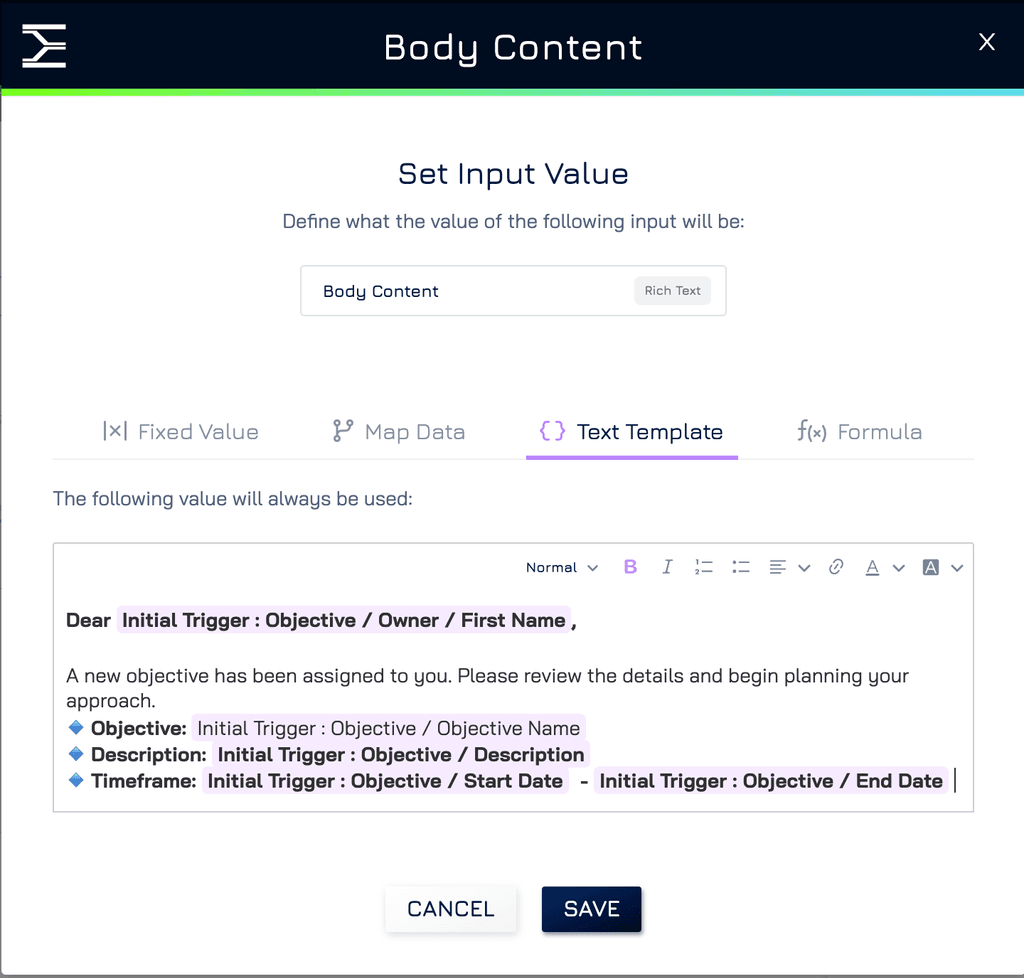
With text template, you can pass the variable into the text by typing “/”, and then search for the variable that you need.
Add a button to view the record by navigating to Action → Add Button. Configure as below:
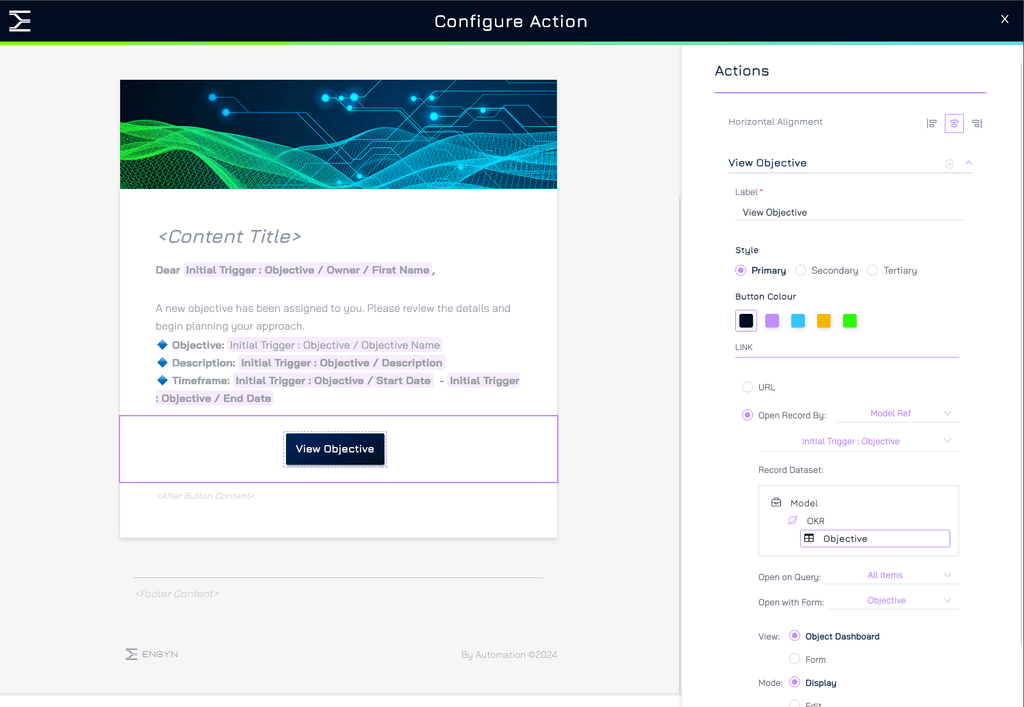
Update the Action Name (E.g, “New Objective Notification”)
Click Save and Enable to activate the automation
You can repeat the same steps to add automation for Key Result data
Using the OKR Tracking Solution
Now that we have a fully functional system, let’s see how to use it.
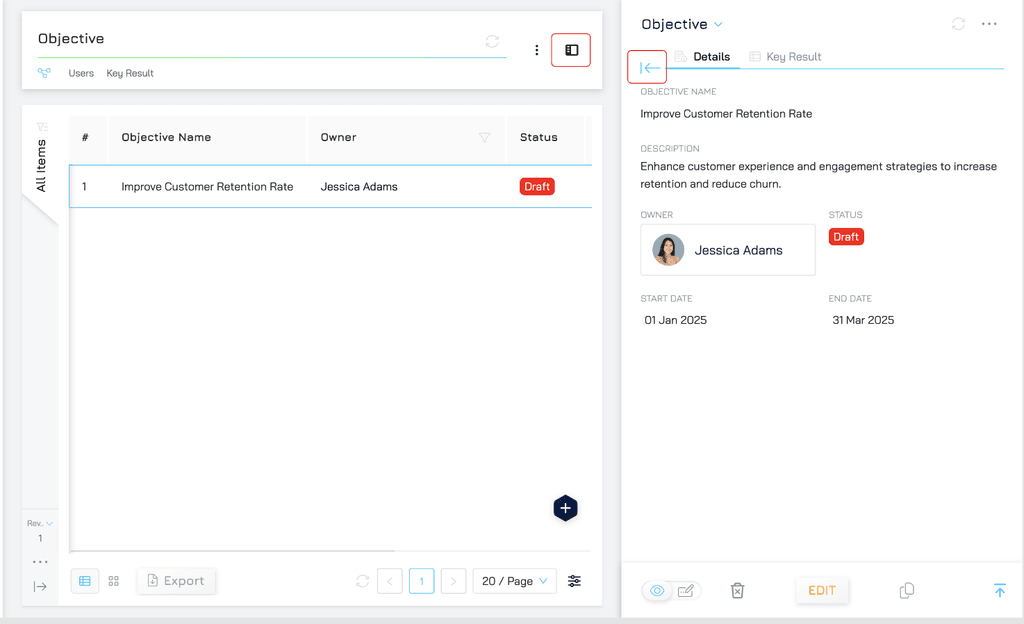
1. Adding Objectives
Navigate to Core → DataSets → Select Objective dataset.
Add a new objective
Click + button in the bottom right corner
Enter objective details → Click Submit.
(Optional) Check Submit Another to add multiple objectives quickly.
When an objective is added, the owner will receive a notification email.
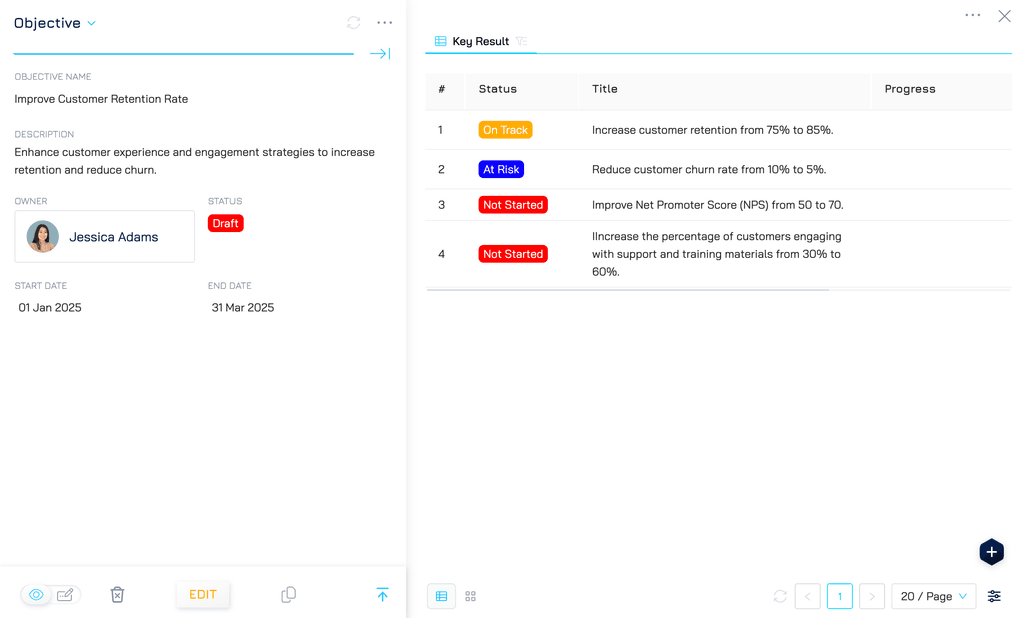
2. Adding Key Results
Select the objective you want to add key results to.
Navigate to its object dashboard
Click the button to open the slit view
Click the button to access its object dashboard


Add a Key Result
Click + button to add a new key result
Fill in the details → Click Submit.
Continue to add the key results as needed
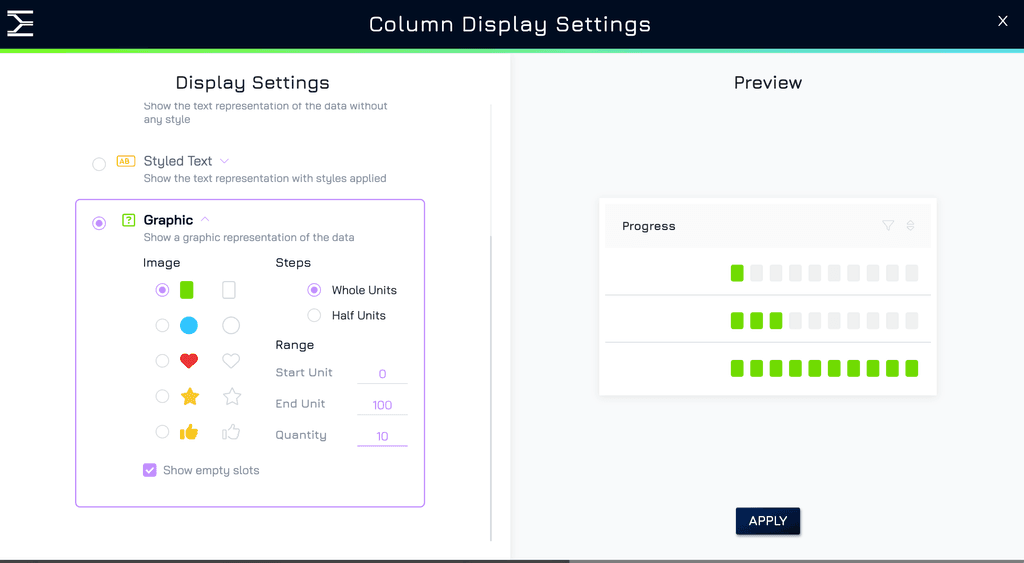
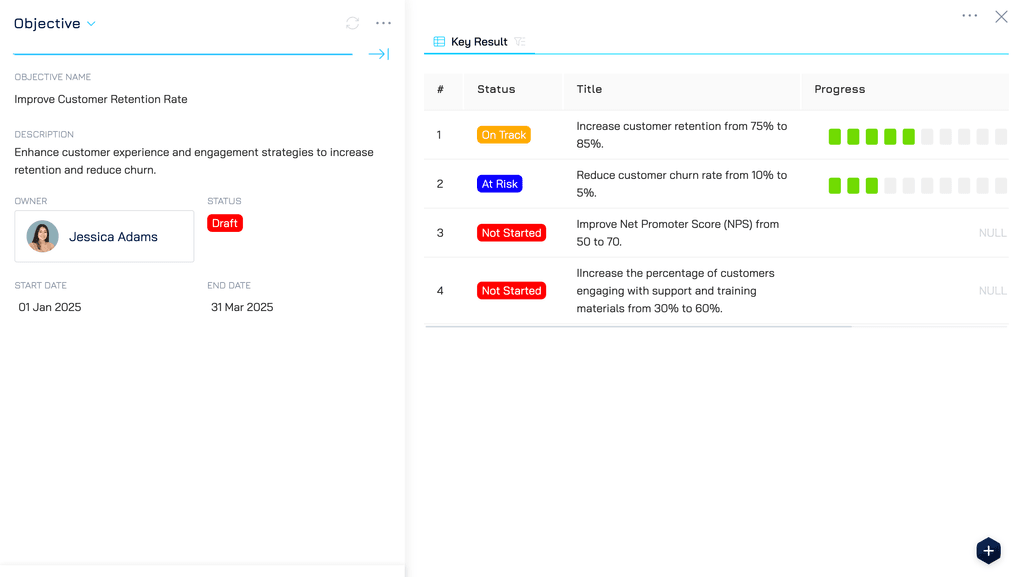
3. Customize Data Format and Display
Engyn allows you to customize the display format of each column using various options. You can modify these settings in the Query Settings panel.
Click the button to access the Query Settings panel
Under the Columns section, you will find a list of available properties. Here, you can:
Rearrange columns
Hide or show specific fields
Adjust display settings
For Example, instead of displaying progress as a number, you can change it to a more visual representation for better clarity.
Conclusion
Congratulations! You have successfully built an OKR tracking solution using Engyn. You have learned how to:
Create structured forms to collect and manage data.
Automate workflows to streamline data management.
Customize data display formats for better usability.
With these new skills, you can build even more customized solutions for your team. Explore Engyn further and unlock the full potential of no-code business automation!