Introduction
Show only the information needed to do the task at hand to make work easier for you and your workmates. Teamwork often involves collaborating over data in a single Dataset, however, not every column in a table, nor every control in a form, is relevant to every user. By using multiple forms for a single dataset customized to the task and context of each user, you can make work quicker and easier for everyone.
How It's Done
Every new Dataset comes with a generic form or the Dataset was created during the course of creating a new form. This means there is always a form to a dataset, so you can start creating another form for the table right away. Creating another form is as simple as selecting an existing dataset when creating a form using the Forms Designer.
Example: Application Tracking with Optimized CV Review Form
To illustrate how to do this, we will set up a simple Application Tracking solution where the planning stage requires only certain parts of the overall form.
Step 1: Create an Application Tracking Form
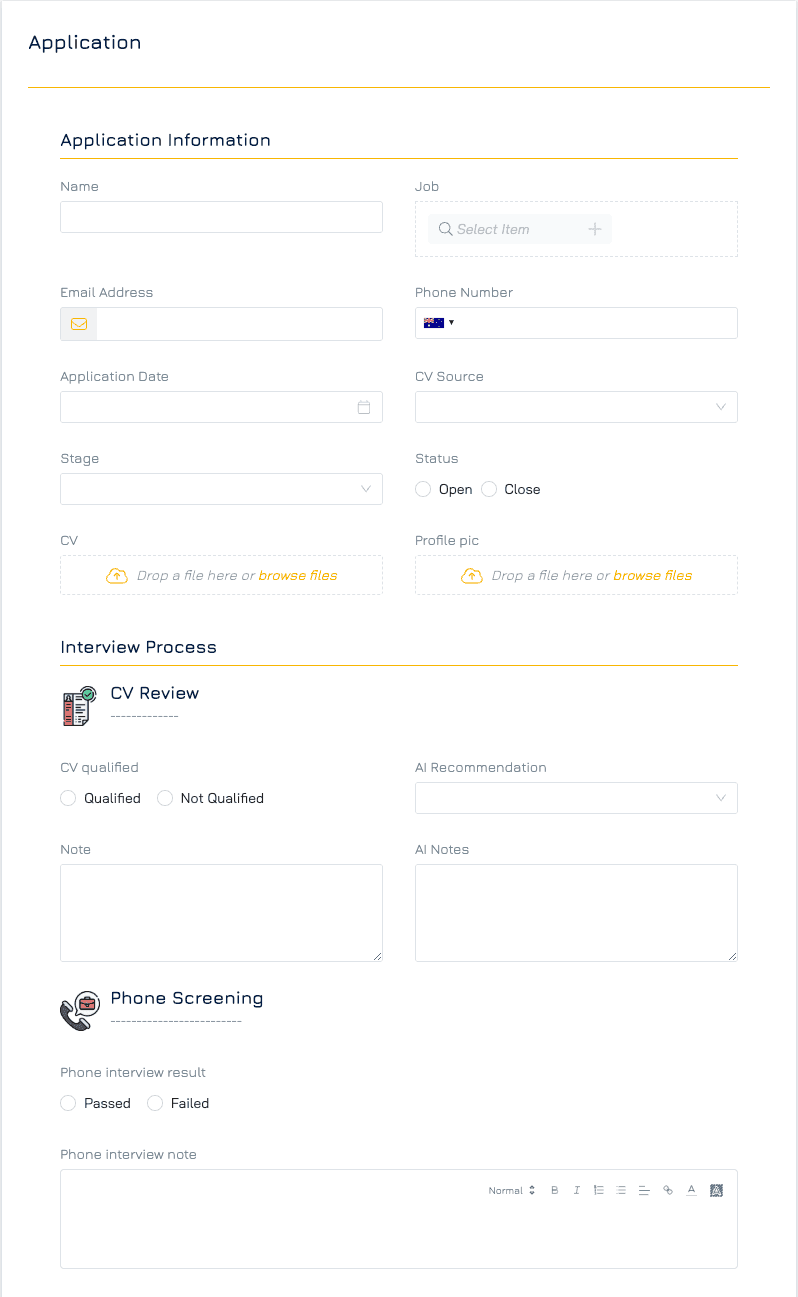
Create a form that you can use to track applications for your hiring process, or at least the Model Object that will have the data.
Step 2: Create a CV Review-Specific Form
Choose one of the following methods to create a dedicated form for the CV Review stage:
Customising the Generic Form → preview the generic form and go to the menu and select “Customize Form”.
Create a variant of an existing Form → preview the existing Form and go to the menu and select “Create Form Variant”.
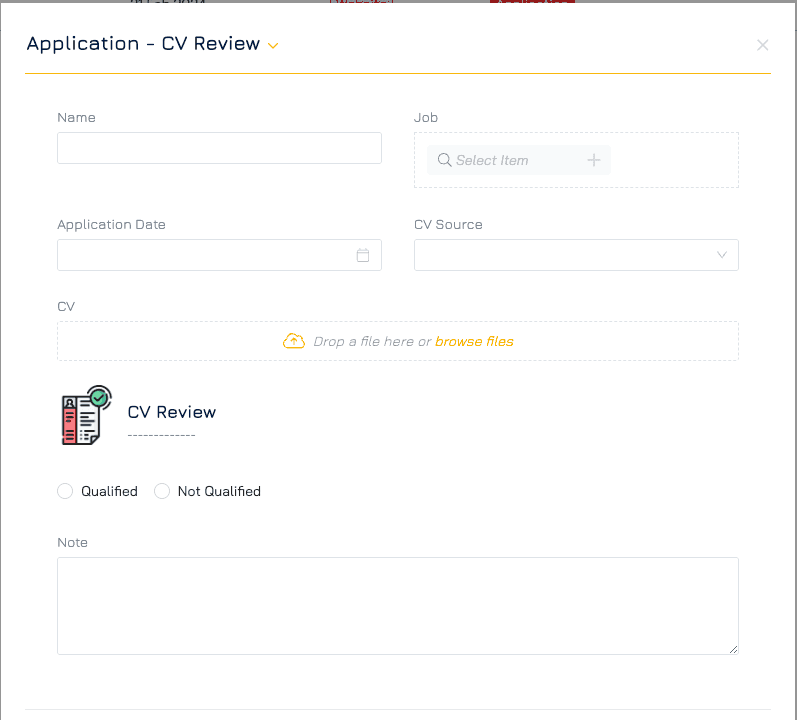
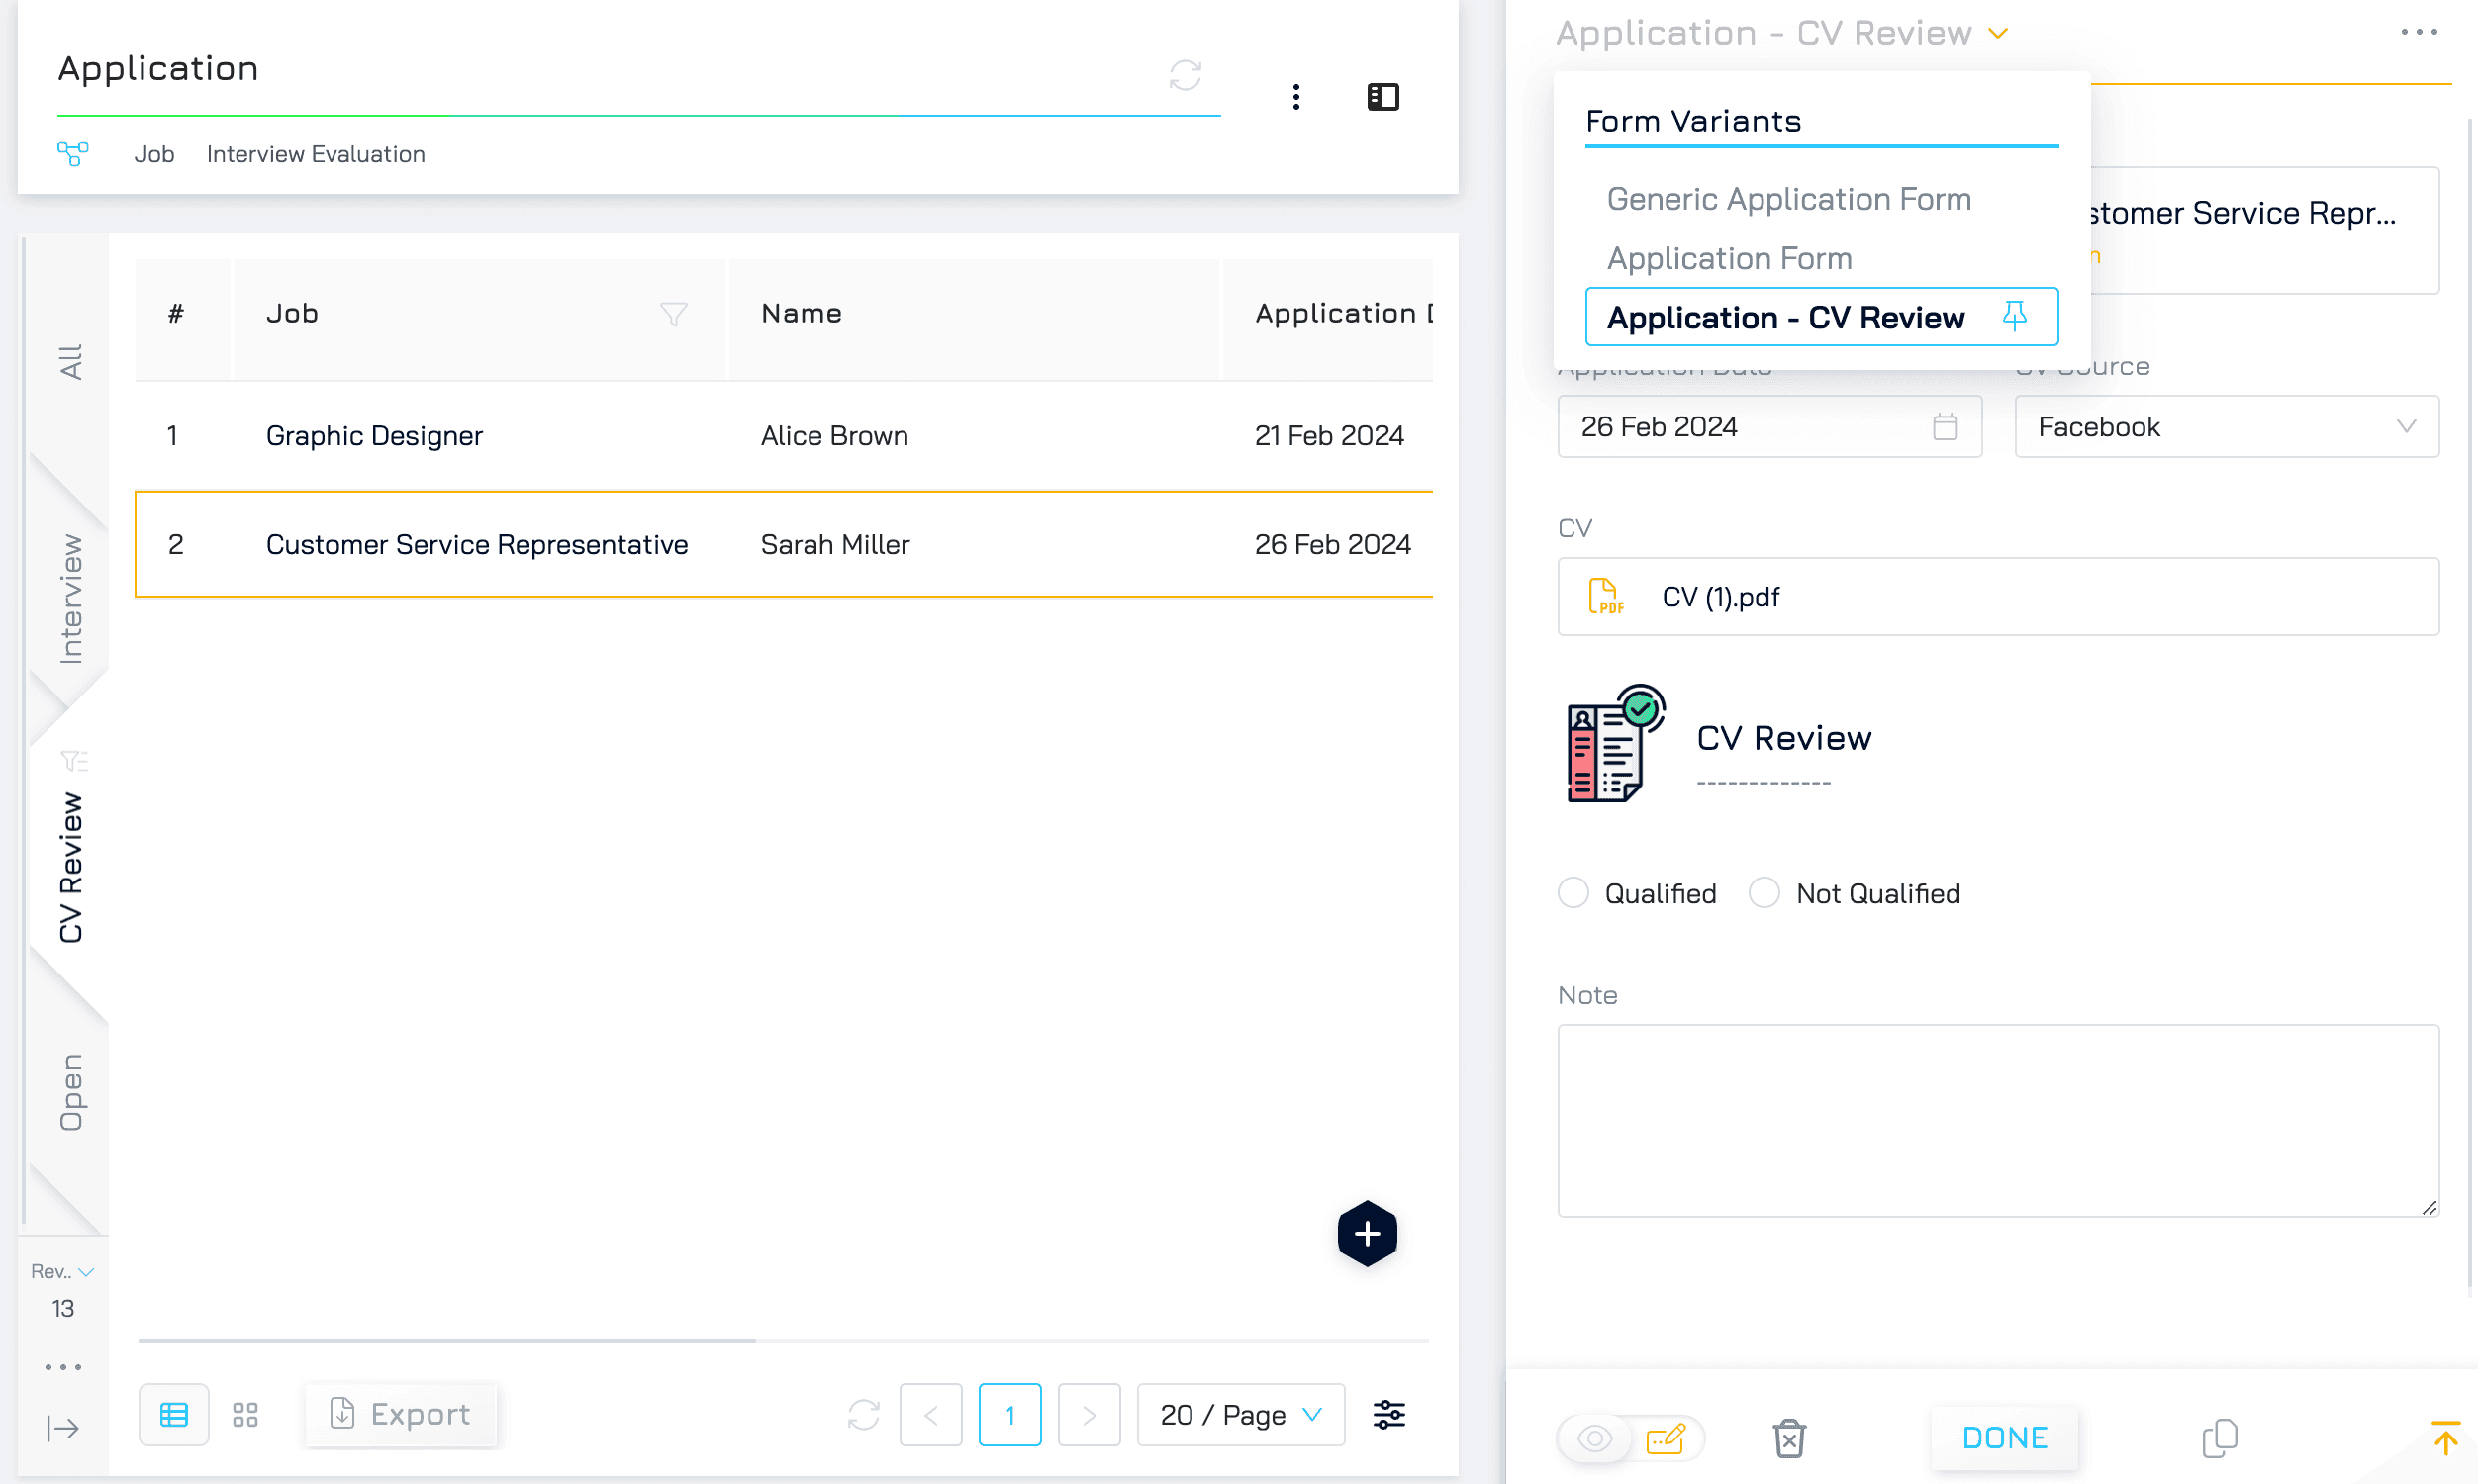
Creating a new form via the Forms Designer → Go to the Forms Designer screen and click the Create Form button. For this example, name it “Application - CV Review” and select the datasource as an existing dataset. Select the same Application dataset as the dataset.
Step 3: Optimize the CV Review Form
Edit the new “Application - CV Review” to your needs and publish. In this case, we want to use this particular form for the CV Review stage, so hide any fields not relevant to the review stage (for this example, ensure there are a few form controls not relevant to the review stage so you can leave them out of this form and experience the difference). After publishing, your new form can be used right away.
Step 4: Filter Applications for the CV Review Stage
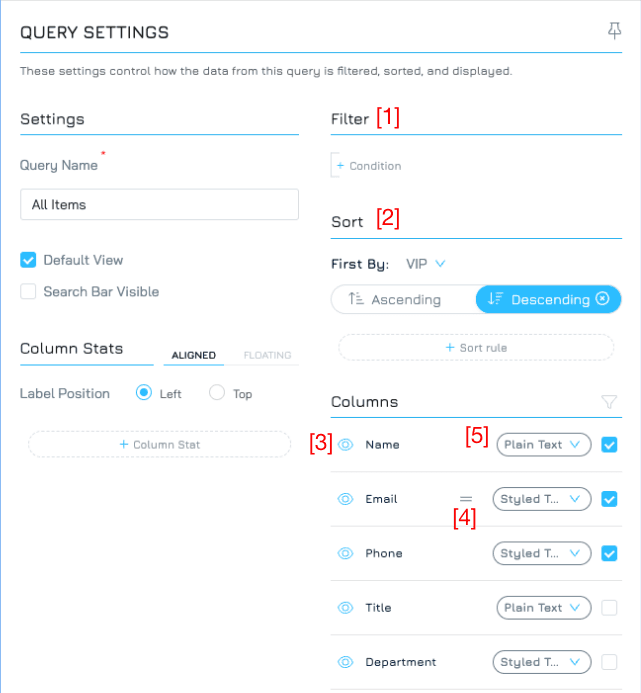
Next, go to the Application dataset and create a new query (if you are unsure how to create a new query see this tutorial).
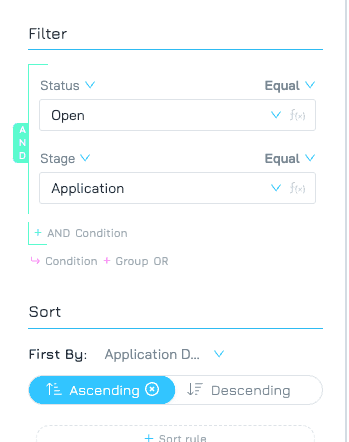
In the Query Settings Panel on the right, add a new condition on the Stage property and set the comparator to be “Equals” the “Application” stage. Click Apply. This query tab now should only show applications that need to be reviewed.
Step 5: Assign the CV Review Form to the Query View
Finally, click on the split view button on the top right to open the split view if it is not already open. Drop down the title of the form section on the right. It should list the forms mapped to this dataset and you should see your newly created “Event Planning Form” there. Hover the mouse pointer over this item in the dropdown and click on the pin icon. This will set this form as the default form for this query.
That’s it! Now users looking at items in the CV Review stage query will see the details of each item through the CV review optimised form. It's that easy to set up Engyn to use the optimal interface for the view of the data you are currently working with.
Take Away
Using multiple forms on the one dataset allows you to optimize the view of the data specifically for each use case, making your processes much more user-friendly and efficient to work with. This is especially relevant when the original form contains a lot of controls.