


Adding a Record
To add a new record:
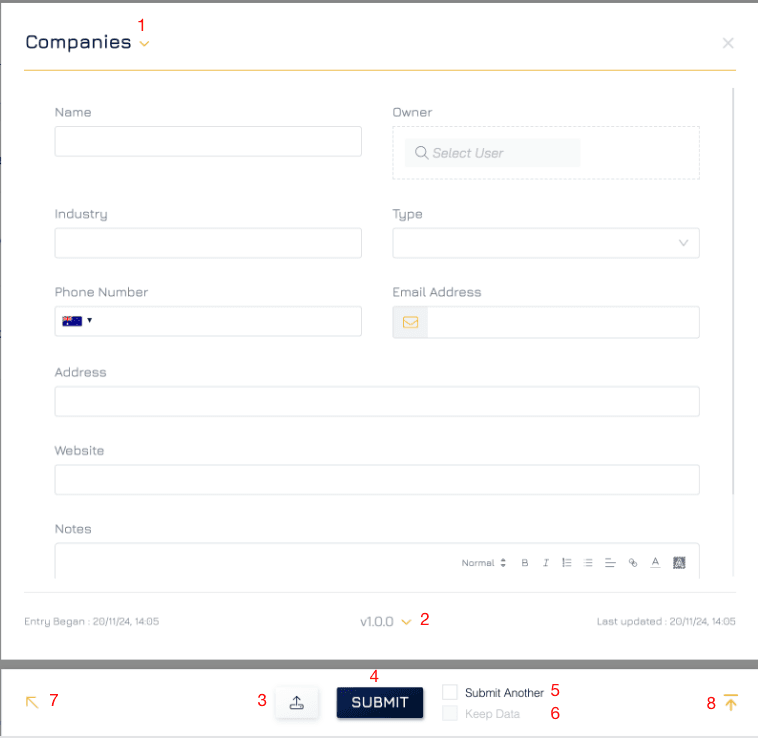
In Table View, click the "+" button in the bottom-right corner to open the form for record creation.
Change the form as needed:
Change Form Used (1): Select a different form for adding the record.
Change Form Version (2): Switch between different versions of the form, if applicable.
Fill in the required fields in the form.
Submit the form: Once the record is filled out, choose from the following submission options:
Submit and View (3): Submit the record while keeping the form open for review.
Submit (4): Submit the record and close the pop-up form.
Submit Another (5): Submits the current record but keeps the form open to add another record.
Keep Data (6) If checked, retain the current record’s data for the next submission (useful for adding similar records).
Other options:
Back (7): Returns to the previous screen without submitting.
Go Up (8): Scroll back to the beginning of the form for a quick review.
Viewing a Record
To view details of a record, click on the corresponding row in Table View or a card in Card View
This will open the Form View, displaying all relevant information for the selected record.
Editing a Record
In Form View, click the Edit button to modify any field within the record.
Alternatively, you can enter edit mode directly by double-clicking a record.
All changes will be auto-saved by the system.