


When creating a linked record within a form, you can automatically prefill specific fields to save time and ensure consistency. This eliminates redundant data entry and reduces errors.
When is Prefill Available?
You can use the record prefill option when your form includes:
A reference field (for parent records)
An embedded child collection (for child records)
Or if you create a record from child collection, you can also prefill your form.
How to Set Up Prefill for Linked Records
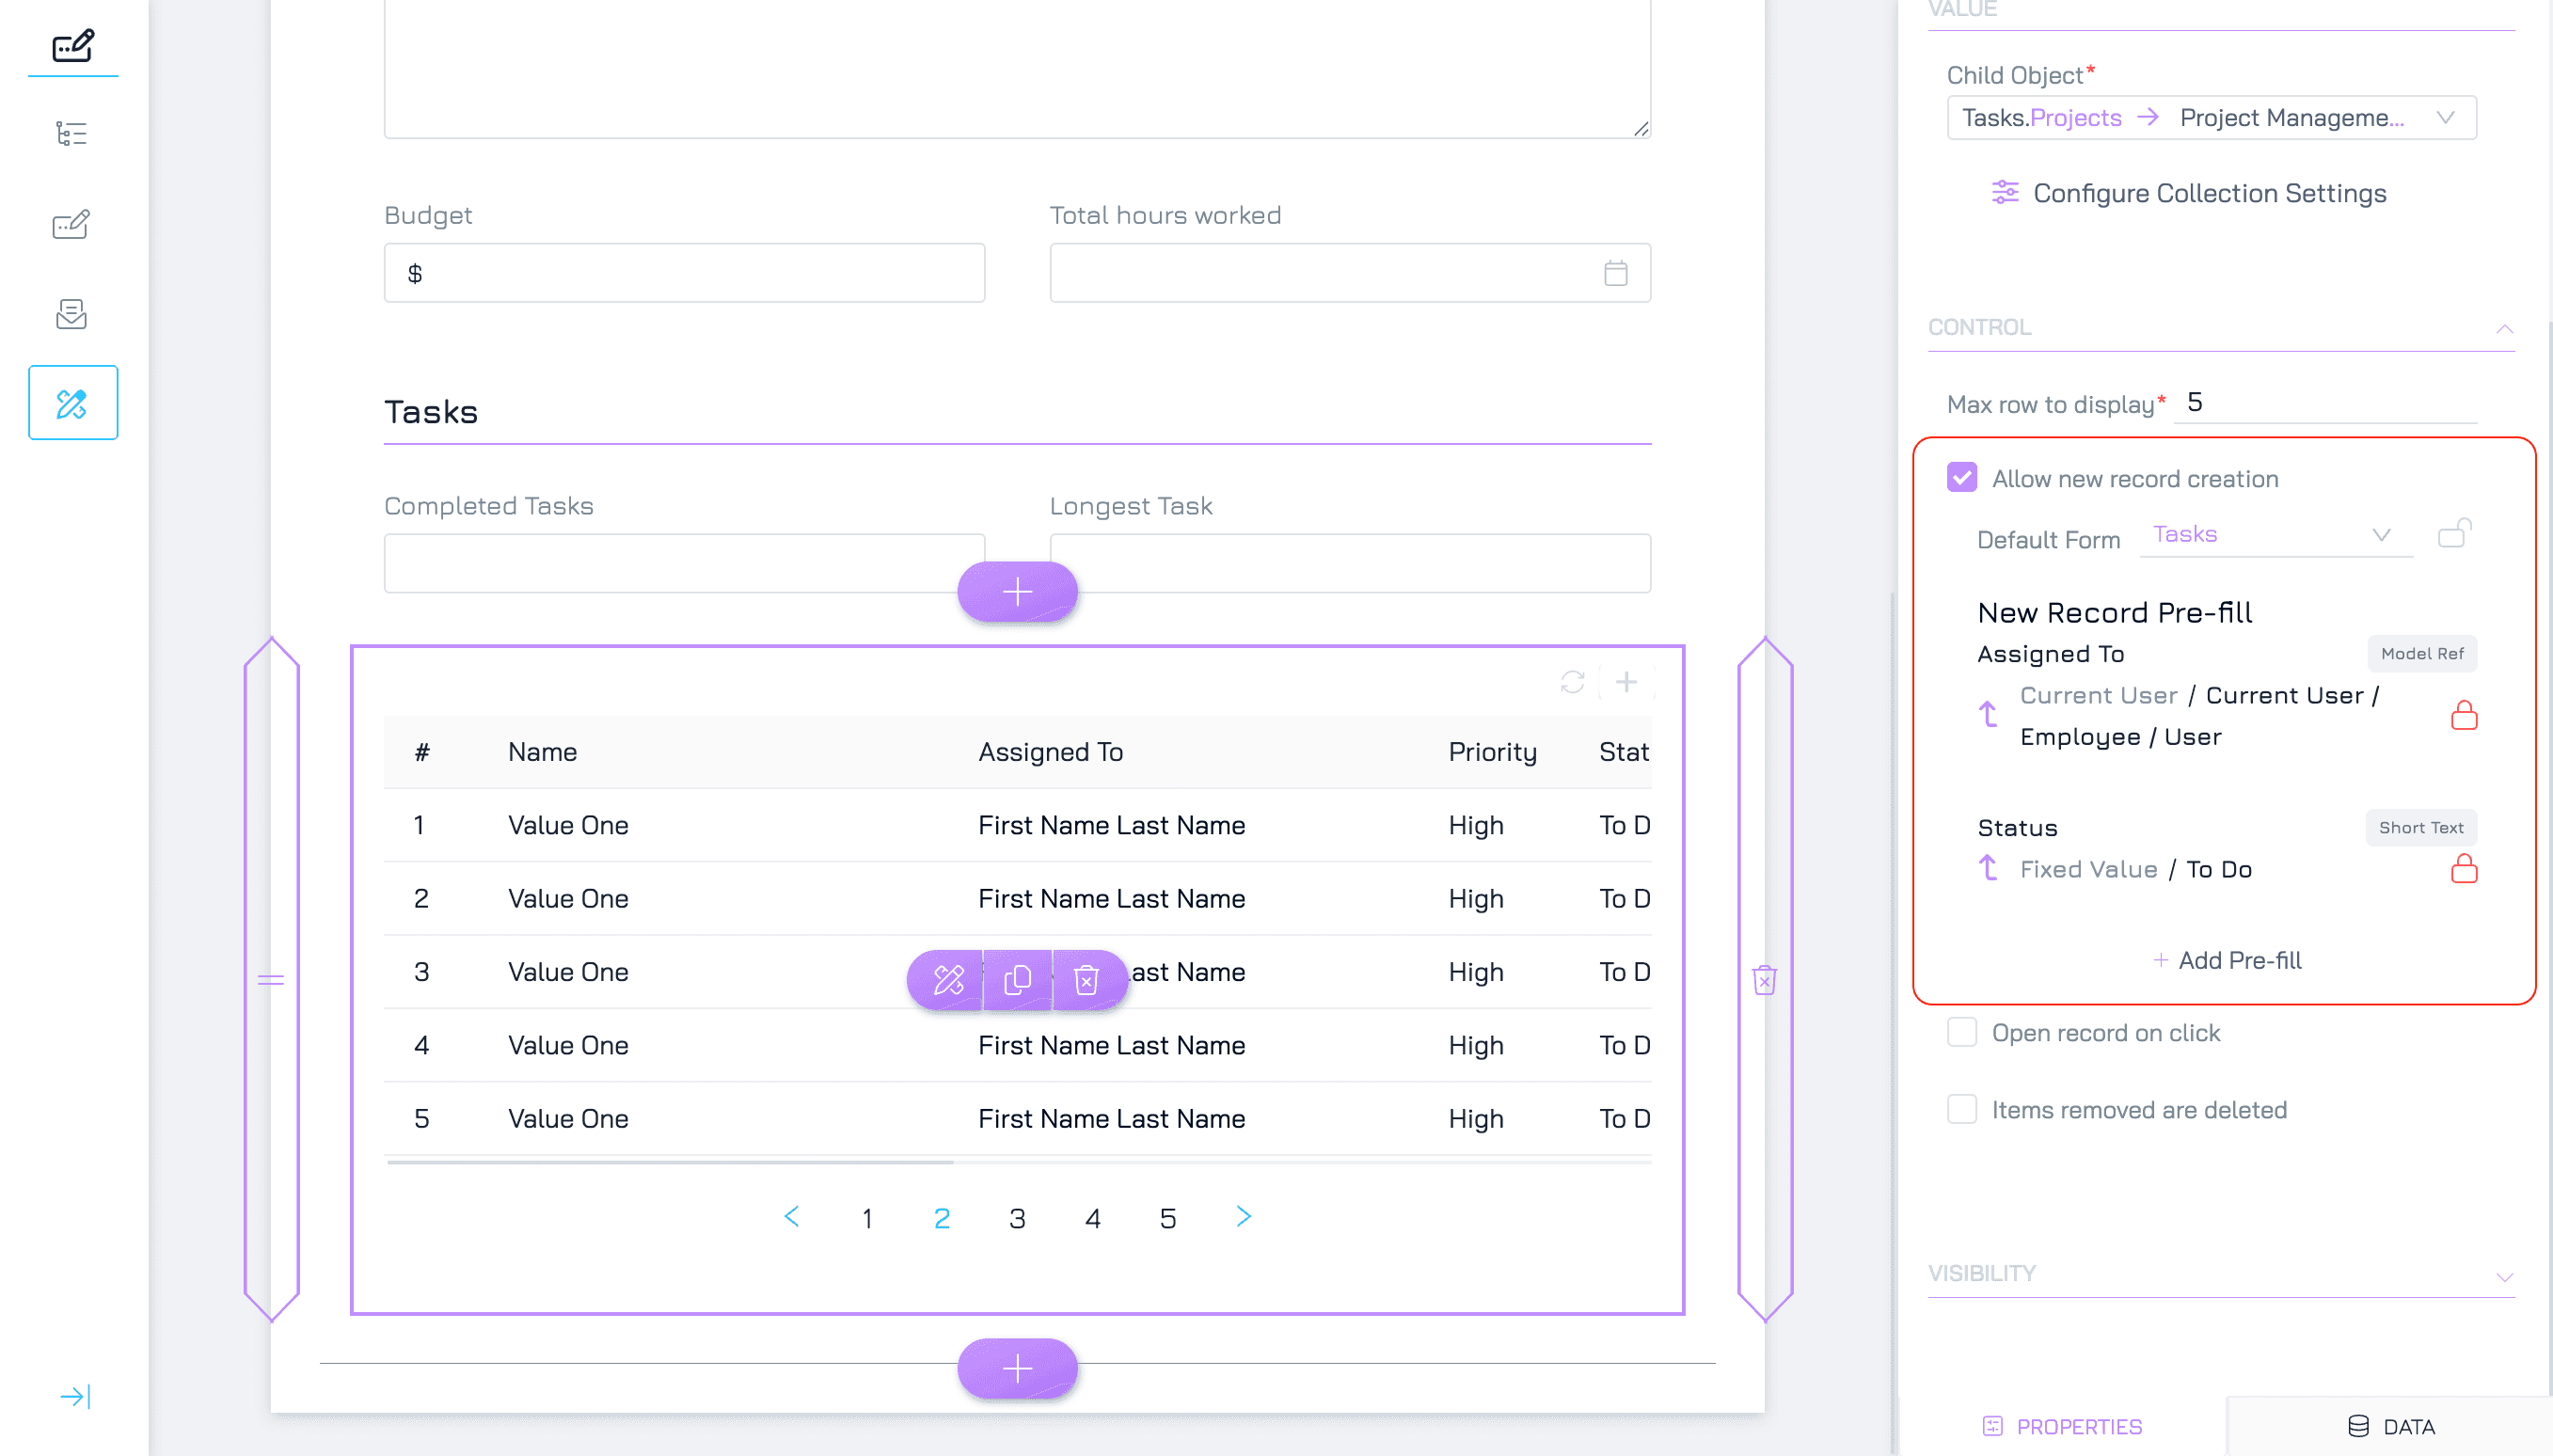
1. Enable New Record Creation
For form control:
Select the reference field or embedded child collection where you want to enable prefill.
Under Control Settings, enable "Allow New Record Creation"
For child collection:
Click on query icon to open the child collection setting
Under Settings, enable "Allow New Record Creation"

2. Select the form
Select the form using to create the record from the list of available forms.
3. Add a Prefill Rule
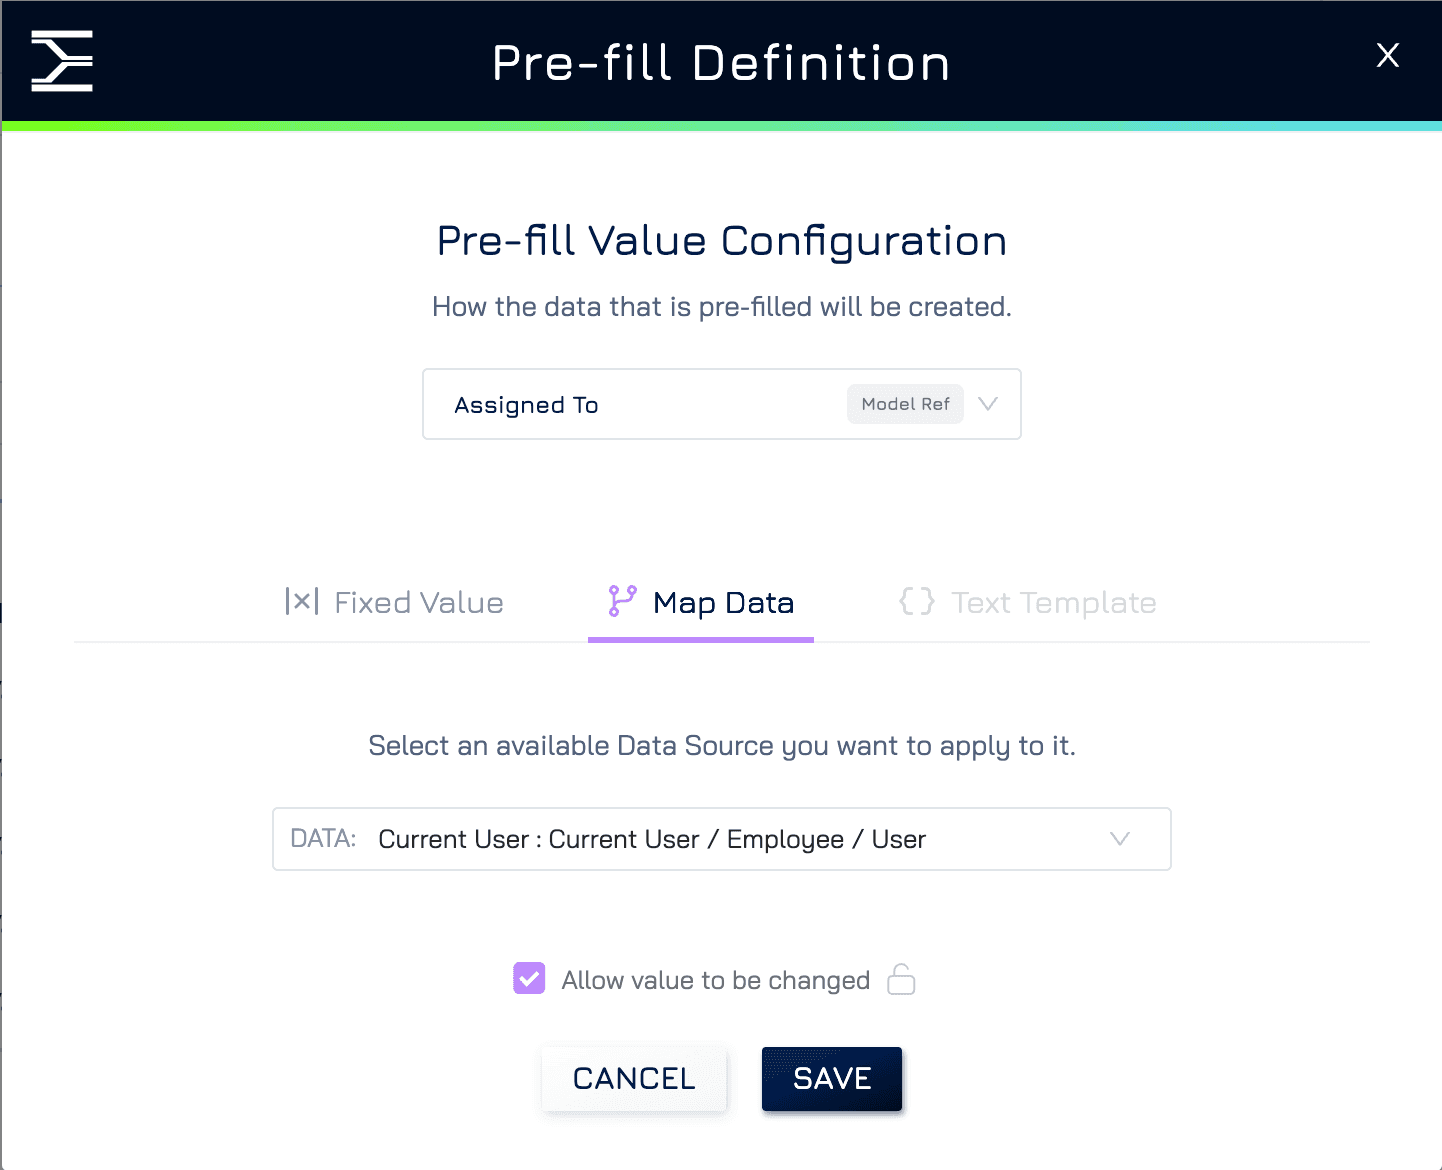
Under New Record Pre-fill, click "Add Prefill."
Select the field to prefill from the dropdown list.
Define how the field should be prefilled using one of the following methods:
Fixed Value – Assigns a static value (e.g., Status = "Pending").
Map Data – Dynamically pulls values from related records, including current form field values (e.g., a Task’s due date matching its Project’s deadline) and current user properties (e.g., auto-assigning a Task to the logged-in user).
Text Template – Uses placeholders to generate values.
By default, prefilled values cannot be changed by users. To allow edits, enable "Allow value to be changed"
Click Save to confirm the prefill settings.
4. Repeat for Additional Fields
If you need to prefill more fields, repeat Step 2 for each field you want to prefill.