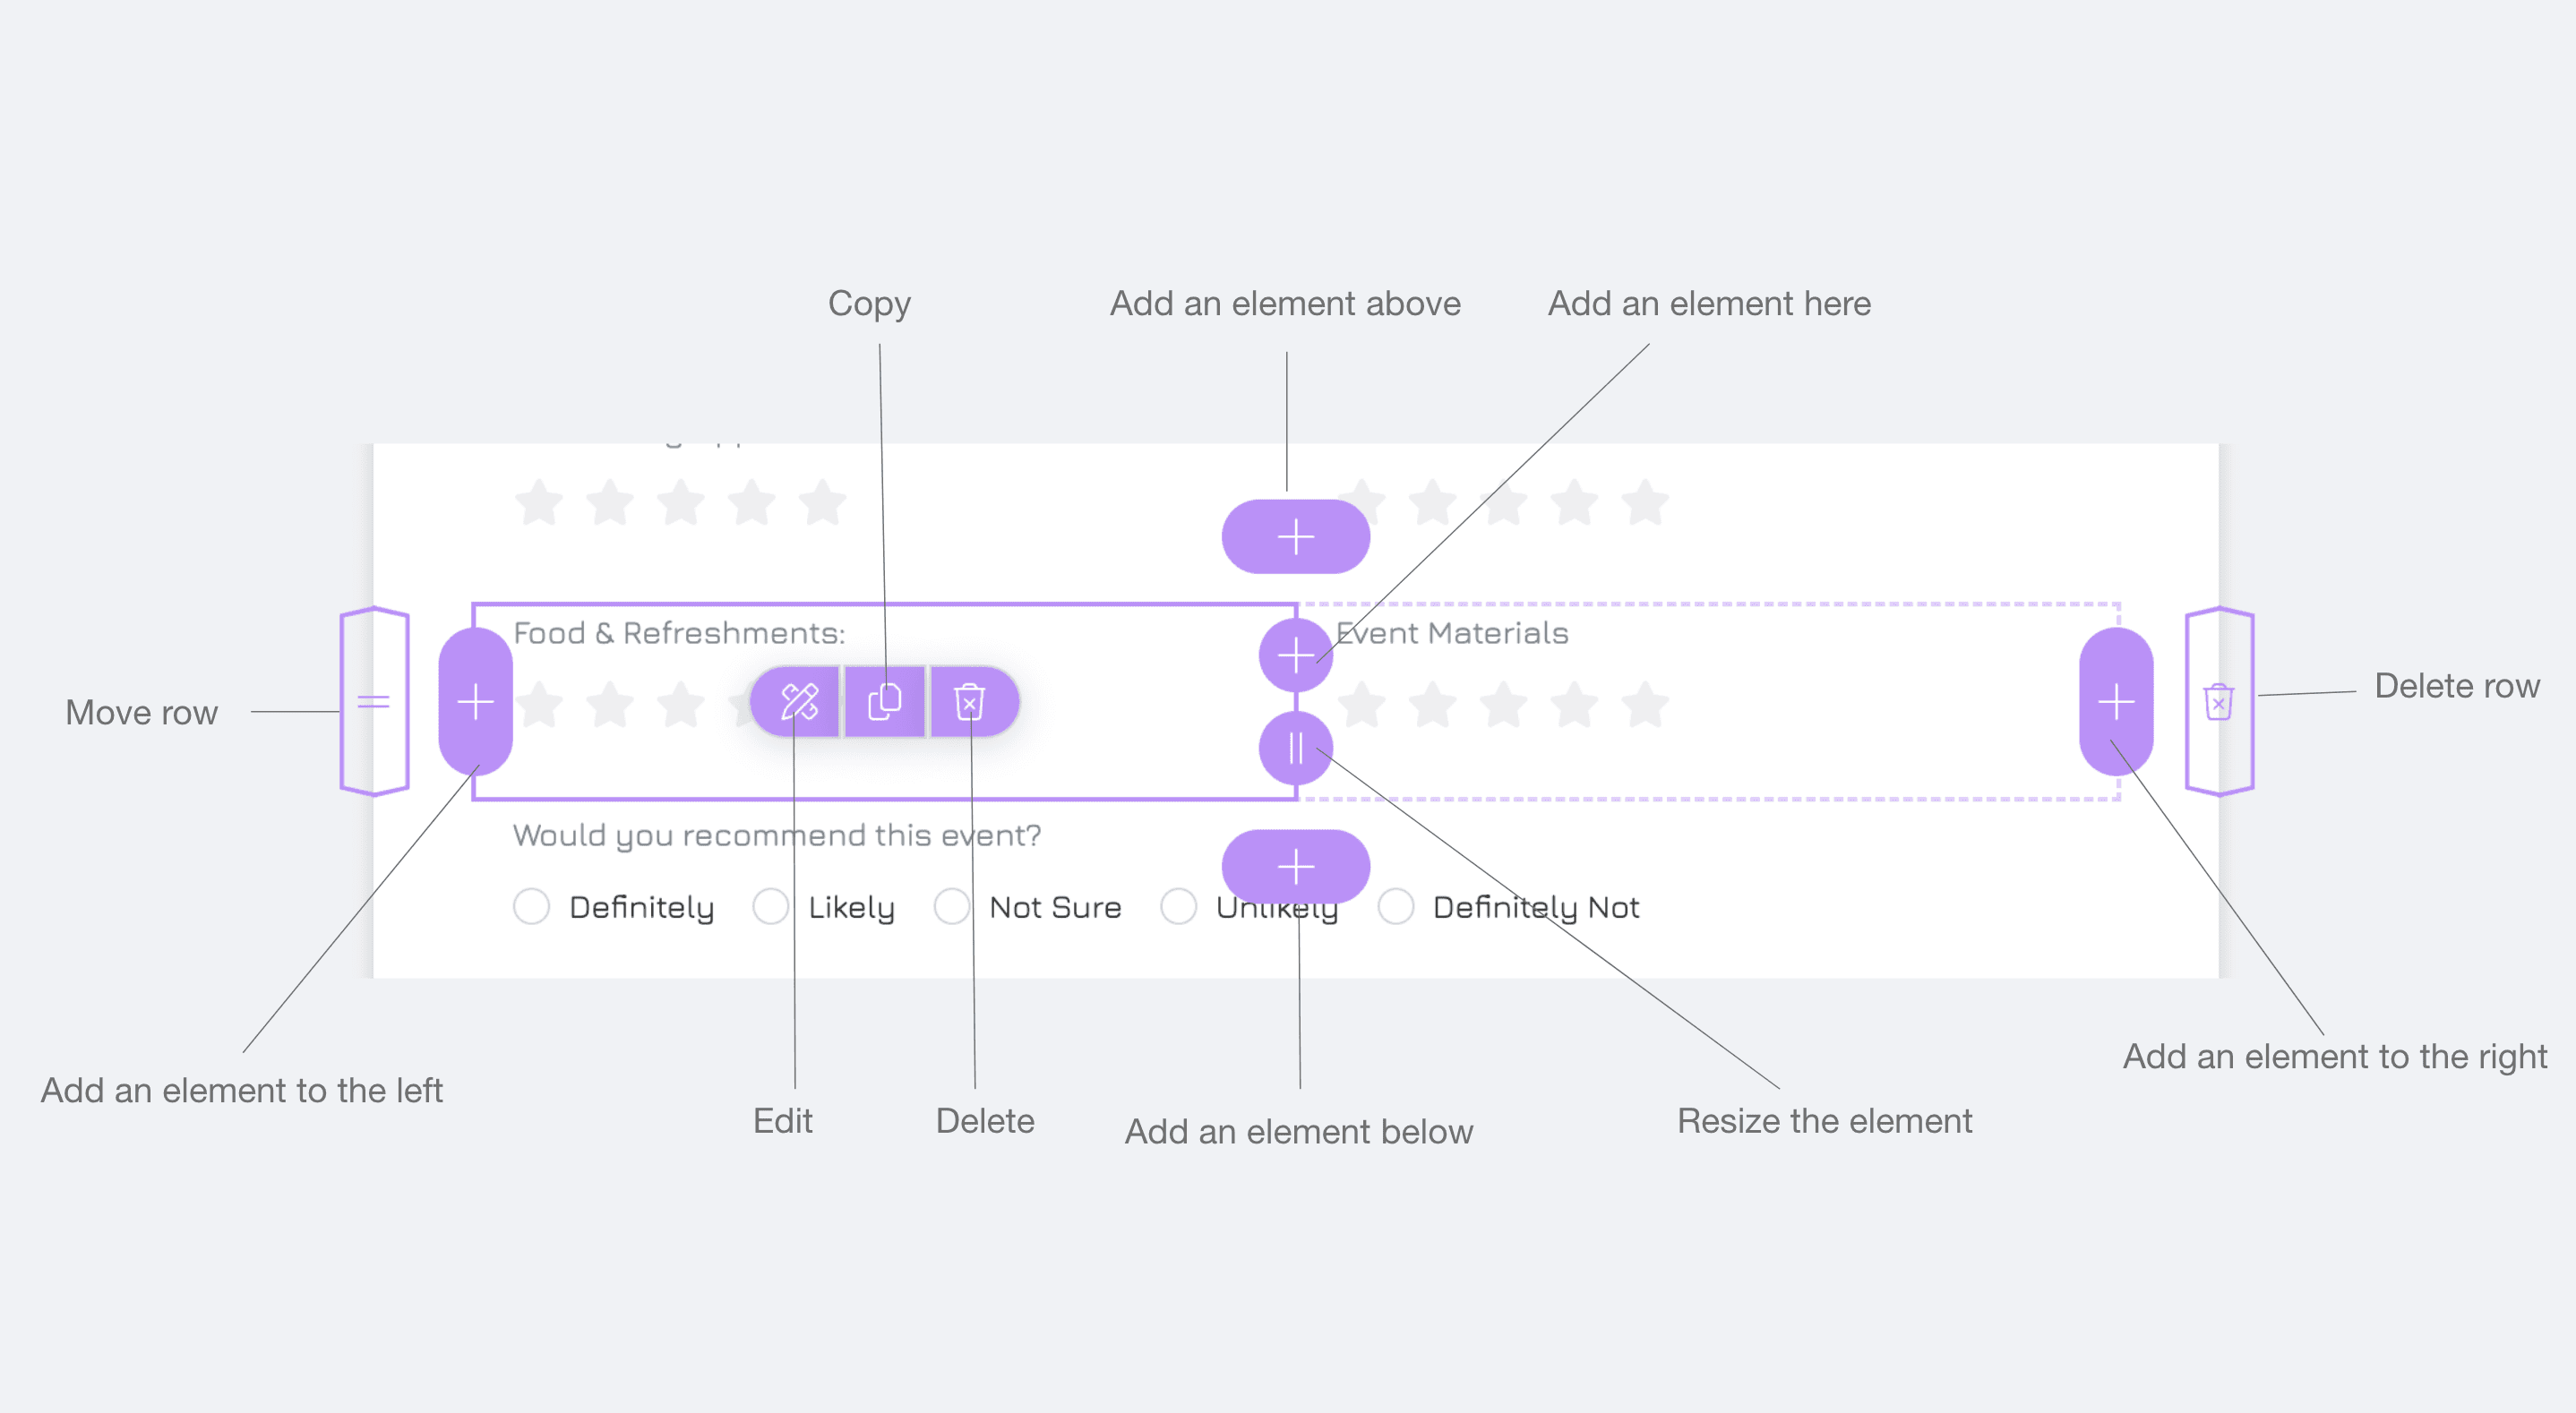
When you select an element, you'll see all available actions for that element, including adding a new one, editing, copying, deleting and moving.
Add an Element
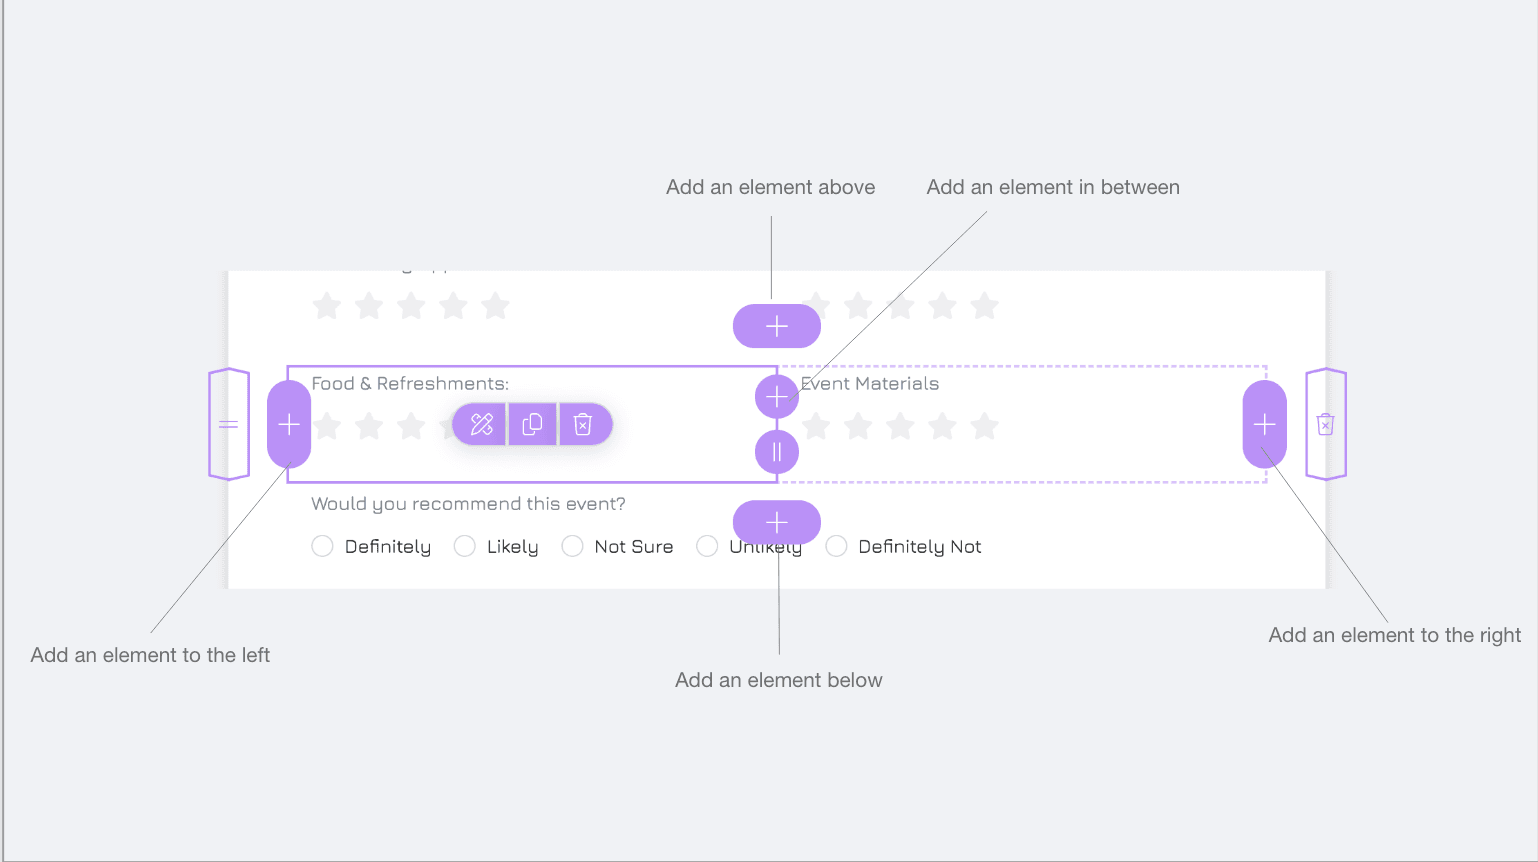
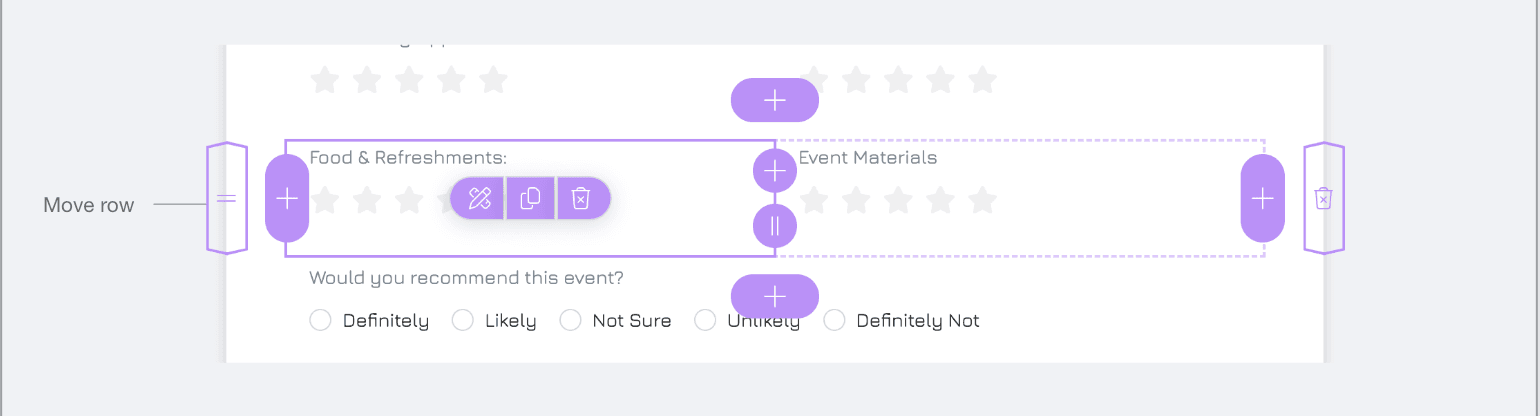
Select the element near which you want to add the next element. You will have options to add the property to the right, left, above, below, or in between two existing elements.
Click the + button in your desired location. This opens the "Add Element" property window where you can choose to add controls, content elements, or components.
For an empty form, click the + button to start adding elements.
Add a Control
Define the property:
Click NEW PROPERTY to define the first field.
Enter a name for your property.
Select the appropriate data type for the control (e.g., text, number, date ,etc.) and click NEXT.
Note: You will find a list of
Existing Unbound Properties: Properties that are not connected to any form control. You can connect your form control to these properties by selecting a property and then clicking NEXT.
Already Bound Properties: Properties in your data source that are already connected to a form control, and therefore cannot be connected to another form control. You can make a bound property unbound by deleting a form control.
Choose the form control from the available list and click NEXT.
Configure the control settings
Click ADD to insert the control into the form.
Add Other Elements
Switch to the Content/Components tab.
Select the element type you want to add and click NEXT.
Configure the settings for the element
Click DONE to insert the element into the form.
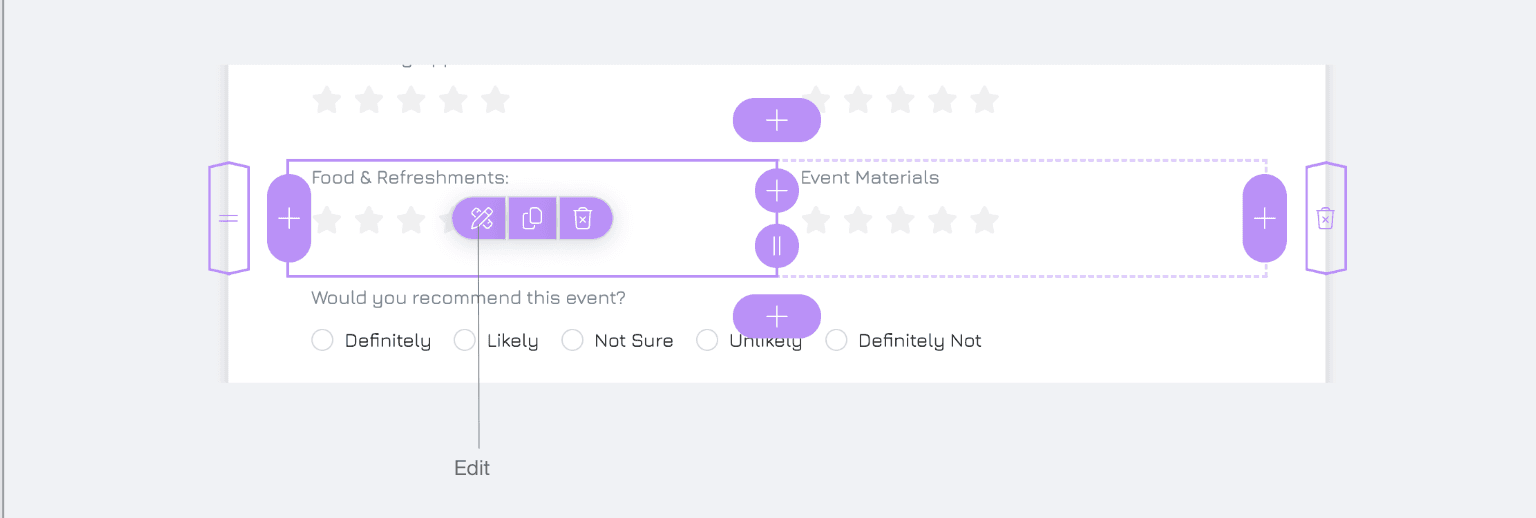
Edit an Element
Select the element you want to edit
Click the Edit button to open the settings.
Make changes to the element such as:
Select a different element.
Edit or update the property linked to the control by clicking button.
Adjust the settings of the element by clicking NEXT to open its settings. You can also modify the element settings in the properties tab on the right sidebar.

Copy an Element
Select the control you want to copy and click the Copy button.
Click the + Control button at your desired design position.
In the Add Element screen, go to the Clipboard tab to see a list of your copied elements.
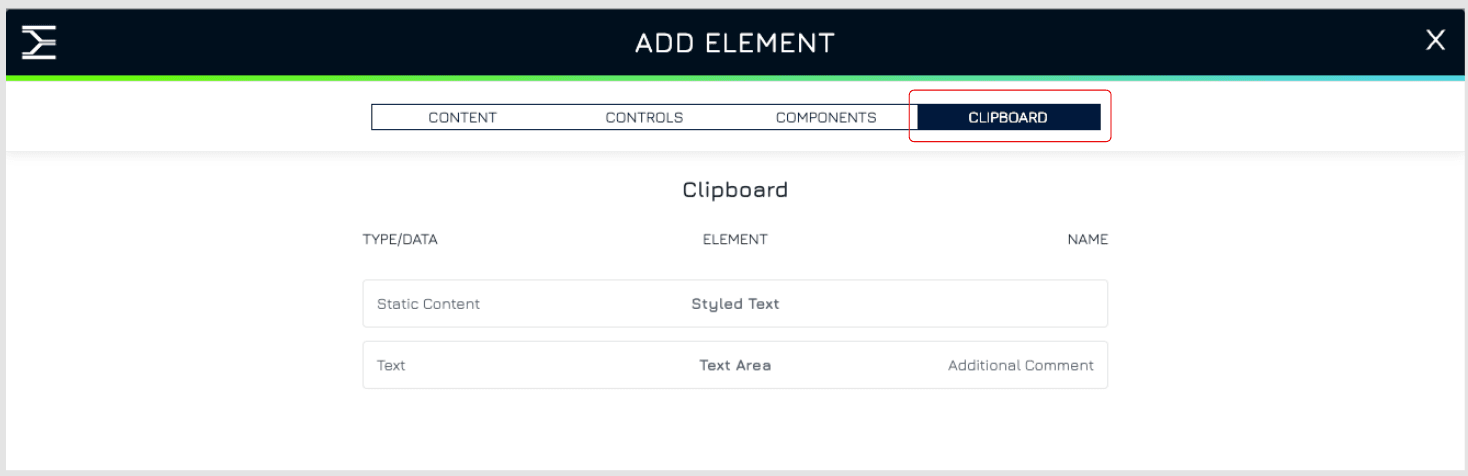
Select the element you want to copy from the list
Make any necessary changes to the element.
Note: Copied elements will have default names in the format "original control name + Copy." Remember to rename these properties as needed.
Move an Element
Select the element you want to move.
Drag and drop it to your desired position. You can also move an entire row by drag and drop.
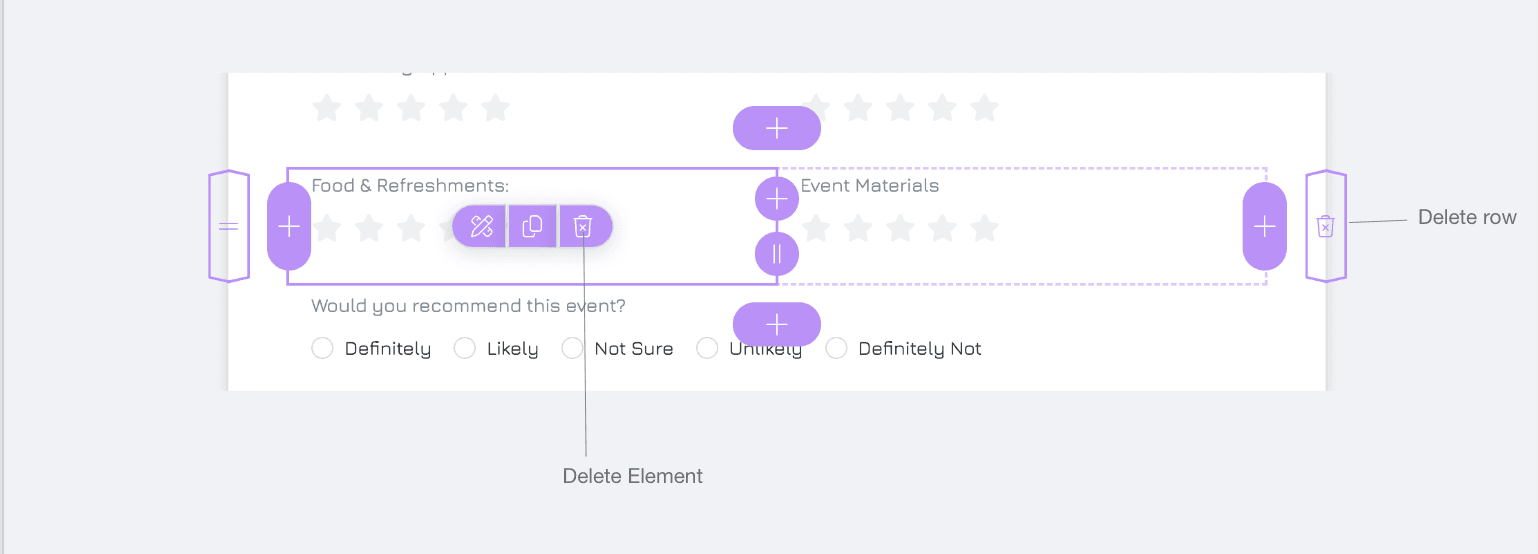
Delete an Element
Select the element you want to delete.
Click the Delete button to remove it. You'll also have the option to delete the entire row.