


1. Navigate to the Automation Screen
Go to the Dataset and select the dataset where you want to create an automation.
Click the
 button at the top right corner of your screen and choose Automations from the dropdown menu. This will open the automation configuration screen.
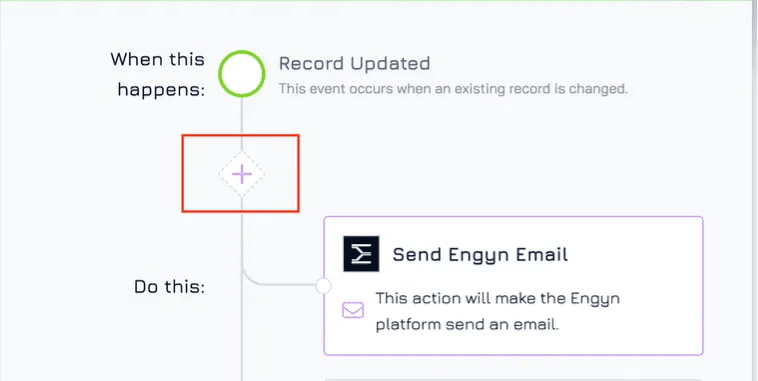
2. Select a Trigger Event
On the left side of the automation screen, choose the event that will trigger your automation (e.g., Record Added, Record Updated) and click the corresponding + Add Automation button to proceed.
You can find a list of available trigger events in Automation Overview.
3. Choose Service Provider and Action
Select the service provider (Engyn or an integrated tool, such as Google Calendar).
Choose the corresponding action you want to execute (e.g., Send Email, Create Event).
You can find a list of supported actions Automation Overview.
4. Configure the Action
Once you've selected the action you want to execute as part of your automation, you'll need to set up its specific details.
Depending on the action chosen (sending an email, creating a record, etc.), you'll need to provide relevant information. For example, if you select Send Email as your action, you'll need to specify the Recipient(s), Subject, and Message Body.
Engyn provides different options to define the values for these fields, such as:
Fixed Value
Map Data
Text Template
AI Provide
Calculated
5. Set Conditions for your automation (Optional)
During this step, you can define progress conditions that will determine whether the automation should proceed. Conditions act as filters, allowing the automation to run only when certain criteria are met. Engyn supports two types of conditions: logic conditions and AI conditions.
Logic Condition: A progress condition based on logic is a step that compares a value from the trigger or event to a value you provide. If the comparison has a true result, the actions set will executed. Otherwise the automation will terminate.
Generative AI: Let AI decide if processing should proceed based on the following prompt you create. If the AI feels it can confidently respond with an answer as “TRUE” or “YES” then your automation will continue. For any other case the automation process will terminate.
Set a Progress Condition:
Click the + button

Select condition type: Logic Condition or Generative AI
Set up your condition by comparing specific values from the trigger or event (e.g., a record property) against a value or rule you define.
If the condition is met (i.e., evaluates to true), the automation will continue and execute the action you’ve set.
If the condition is not met (i.e., evaluates to false), the automation will stop, and no action will be executed.
6. Edit Automation Name & Description
By default, the automation will take the name and description from the first action you’ve set up. However, for better clarity and future reference, it is recommended to provide a more descriptive name and summary. This helps you and your team quickly identify the purpose of the automation, especially if you have multiple automations running.
To rename: Click on the Automation Name field and provide a more specific name.
To edit the description: Add a brief explanation of what the automation does. For example, "Sends an email notification when a new order is placed."
7. Activate the Automation
Once all your configurations are done, click Save & Enable to activate the automation.
If you haven't finished setting up your automation or aren't ready to activate it, you can click "Save" to store your changes. You can then turn on the automation later by toggling the activation button when you're ready.
Tips for Automation
Combine Multiple Automations: You can create multiple automations on the same dataset to handle different scenarios.
Test Automations: Always test automations to ensure they perform as expected before relying on them for critical tasks.