This tutorial will guide you through the process of importing data into Engyn
Through this guide, you will learn how to:
Importing directly to create a new table
Importing data into an existing table
Importing Data to Create a New Table
In this tutorial, we'll use a sample file containing employee information such as names, contact details, and job roles. We will import this file to Engyn to create a new object.
Employee_Information_60bd6a69f6.xlsx
Engyn supports CSV and Excel files for data imports. Before proceeding, make sure your data file follows the required format.
Supported Data Formats
When importing data, Engyn automatically detects column data types. Below are some common data formats recognized by the system:
Example | Data Type | Sub Data Type |
|---|---|---|
TRUE, False (case insensitive, empty value will be ignored) | Boolean |
|
1 or -1 | Number | Integer |
1.0 or 1.1 or -1.1 | Number | Decimal |
2024-07-12T04:26:50 | DateTime | DateTime |
2024-07-12T04:26:50+00:00 | DateTime | DateTimeUTC |
2024-07-12 | DateTime | Date |
05:56:59 | DateTime | TimeOfDay |
09:31:38+00:00 | DateTime | TimeOfDayUTC |
f3f462aa-e710-4e8b-ad98-1c84a8814efe | Unique Identifier |
|
Note: Unrecognized data types will be imported as text and can be updated later.
2. Import Data
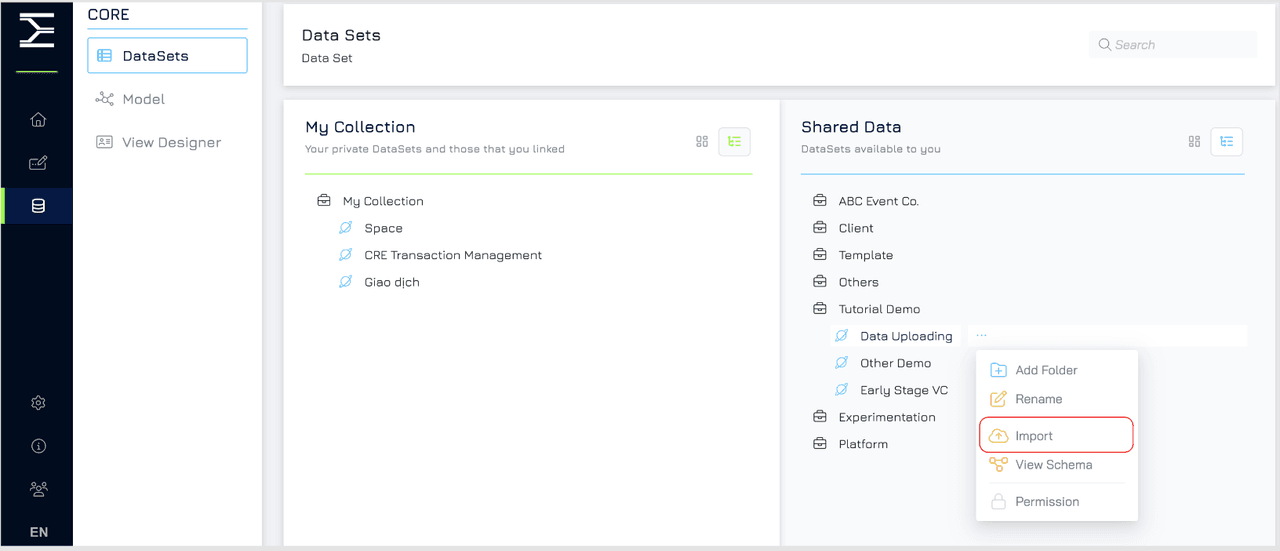
Navigate to Core → Dataset
Hover over the target Space where you want to place your object, click the three-dot menu, and select Import.
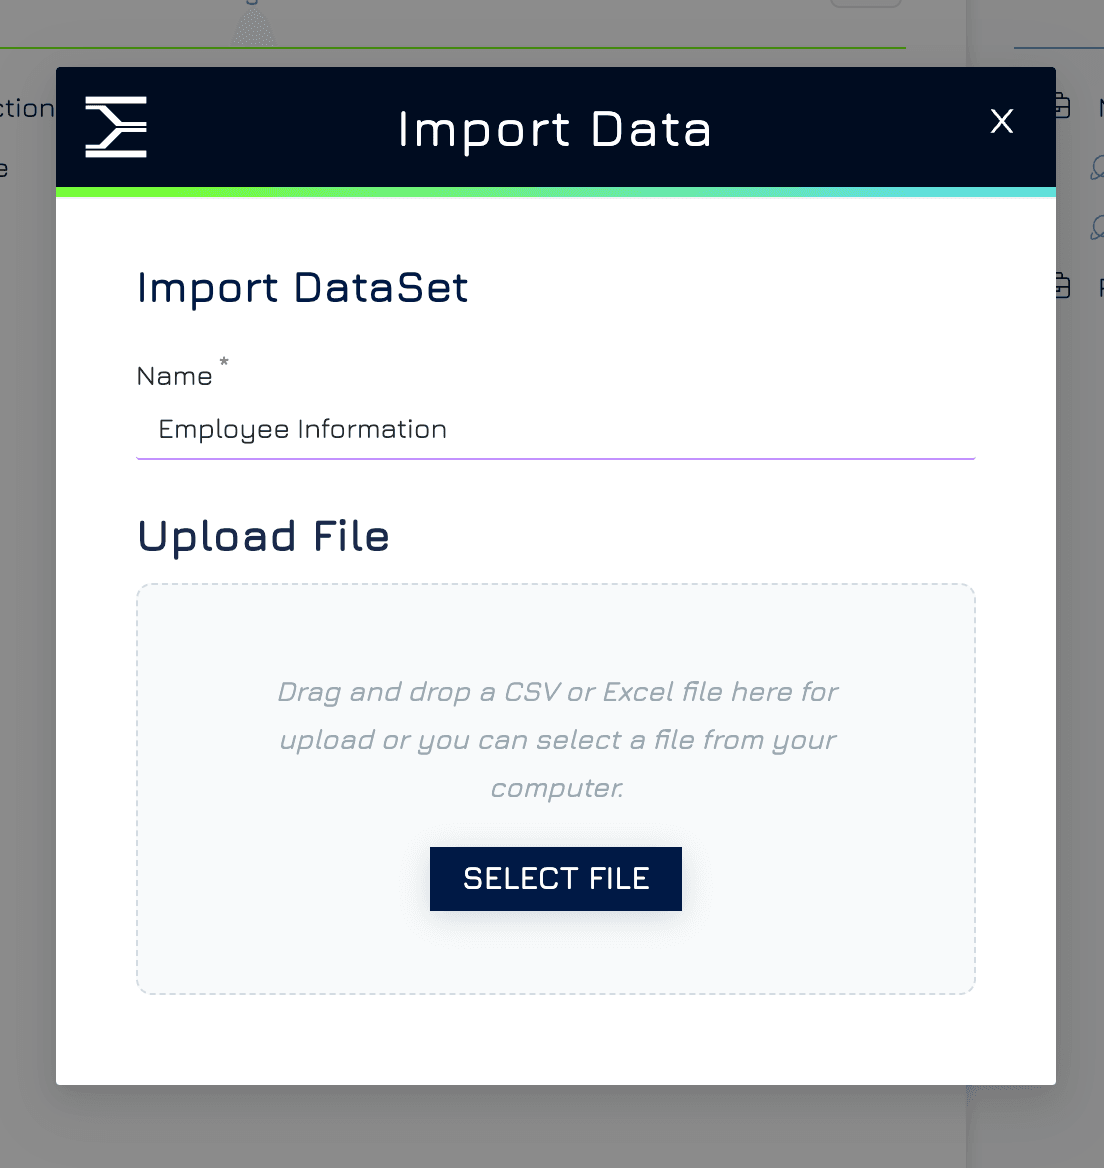
Upload the Data File
Enter a dataset name (e.g., Employee Information ).
Click Select File and upload your prepared data file.
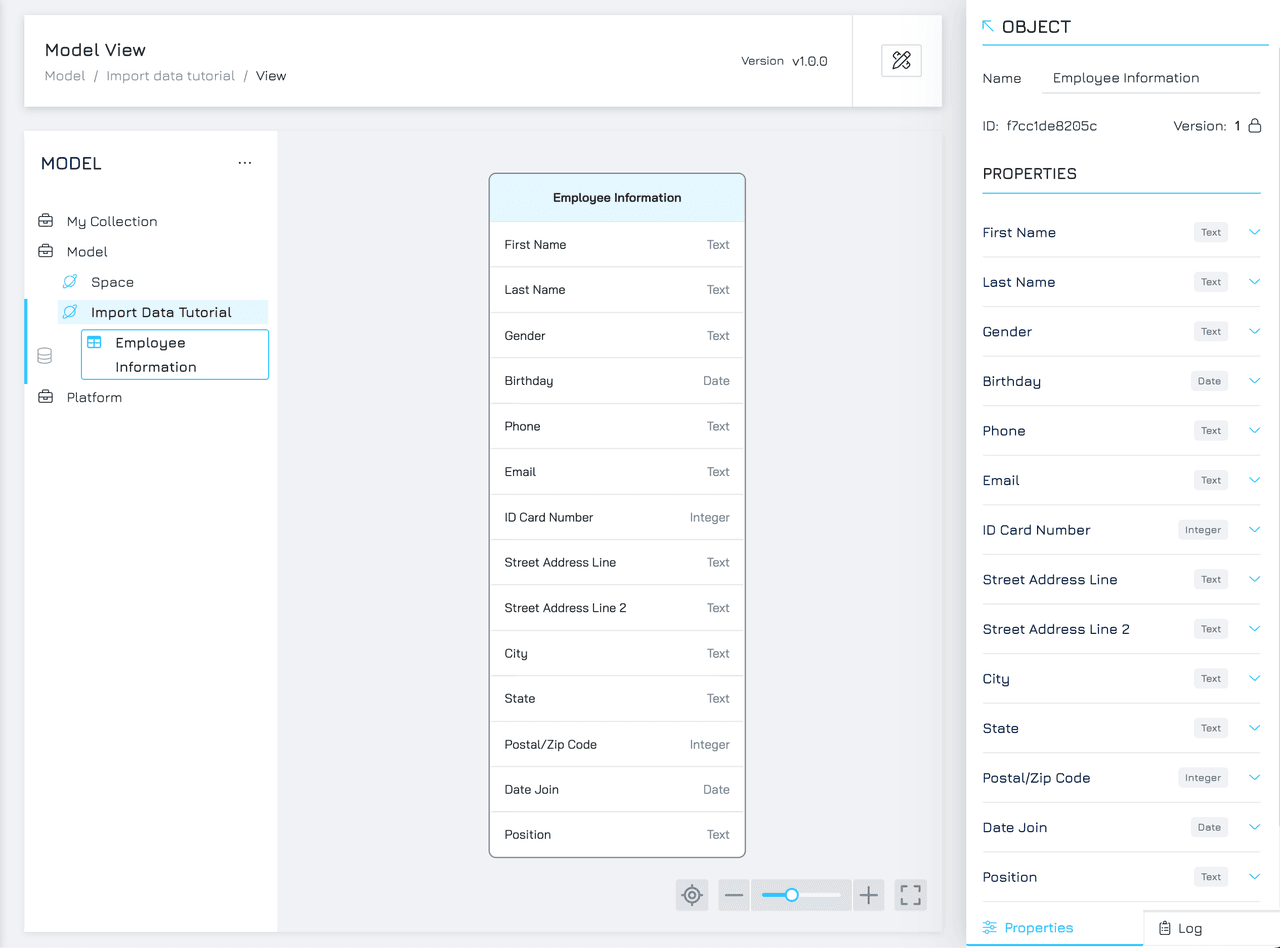
3. Reviewing the Schema
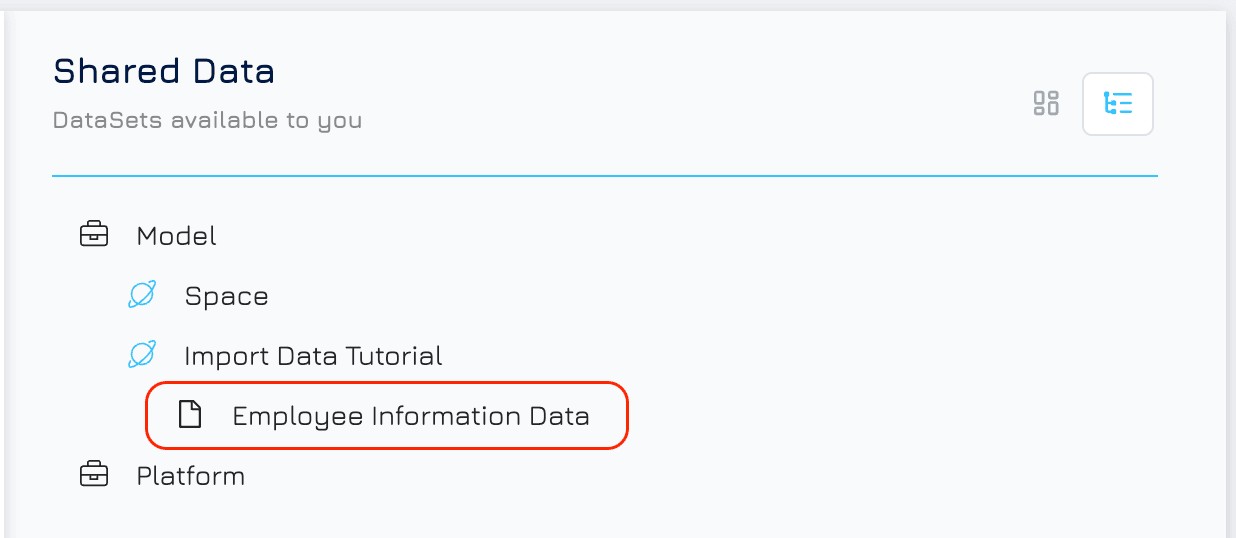
After importing, a new dataset will be created in the selected space.
Engyn will automatically detect the data type of each column. You can review these columns to ensure the data types match your expectations.
Hover over the dataset and click on three-dot button
Select View Schema to navigate to Model
Review the imported properties and their data types.
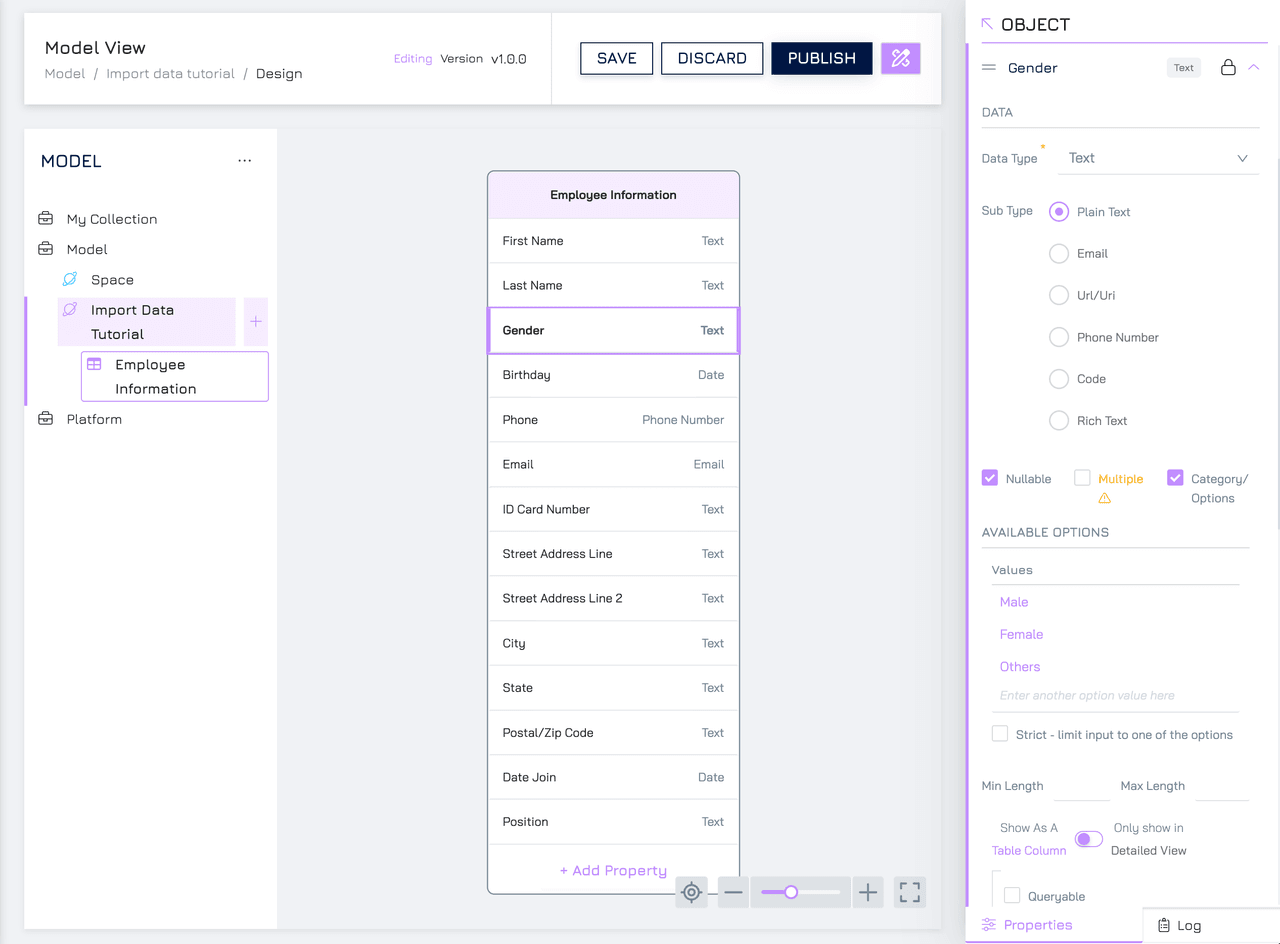
4. Update Property Settings
If the system does not correctly recognise a property’s data type, you can manually update it to ensure accurate data representation.
Click the Design button to enter editing mode.
Select the property you want to update
Change the setting to match the data representation. In this tutorial, we change the data type and setting as follows:
Updated Fields | Original Configs | Updated Configs | Note |
|---|---|---|---|
|
|
Available Options:
|
|
|
|
|
|
|
|
|
|
|
|
|
|
|
|
|
|
After making the necessary adjustments, click Publish to apply the changes.
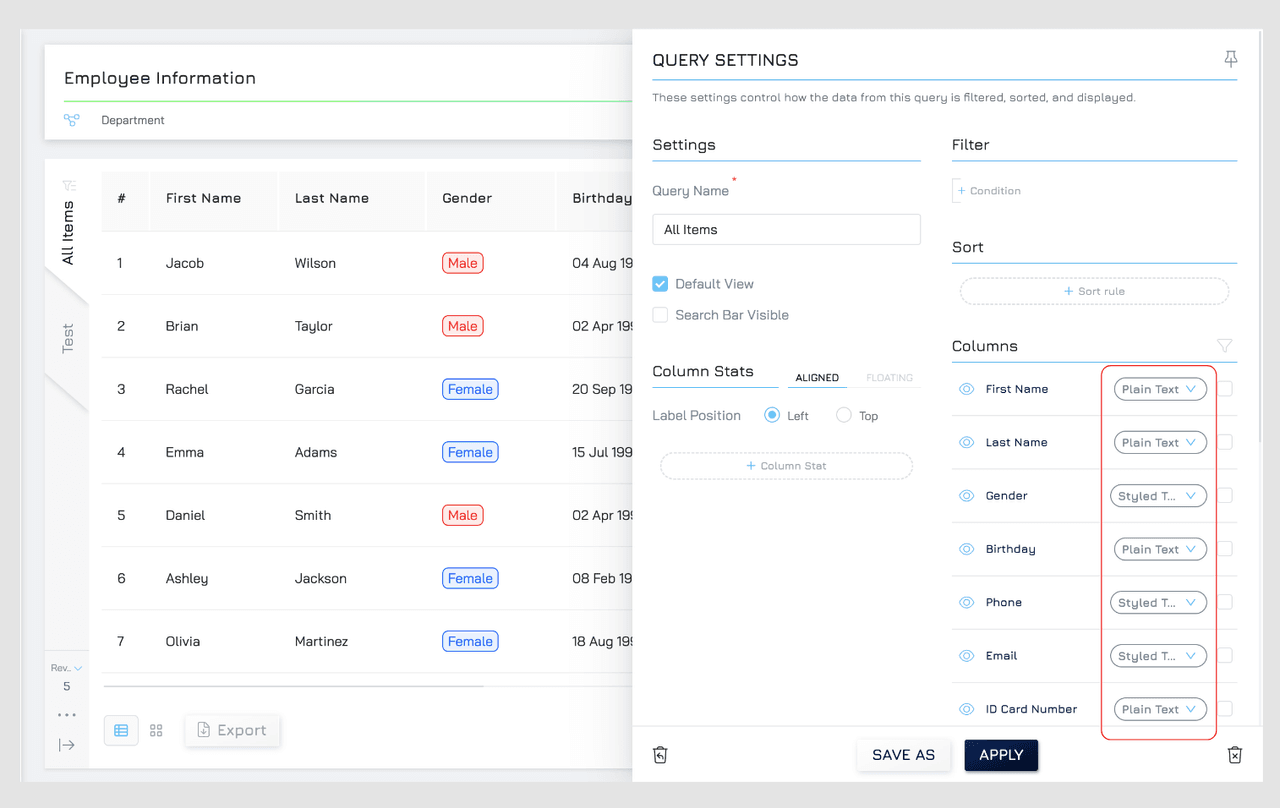
5. View & Format Your Uploaded Data
From the schema screen, navigate back to the data table view by clicking the View Data button in the right bar.
In the table view, Engyn automatically applies default display formats to different data types for better readability. To refine the presentation, adjust settings in the Settings Panel. You can:
Format phone numbers for consistency.
Highlight key fields such as gender or status.
Modify date formats to match reporting requirements.
Importing Data into an Existing Table
If you already have a data table and need to import additional data, follow these steps:
1. Access the Import Option
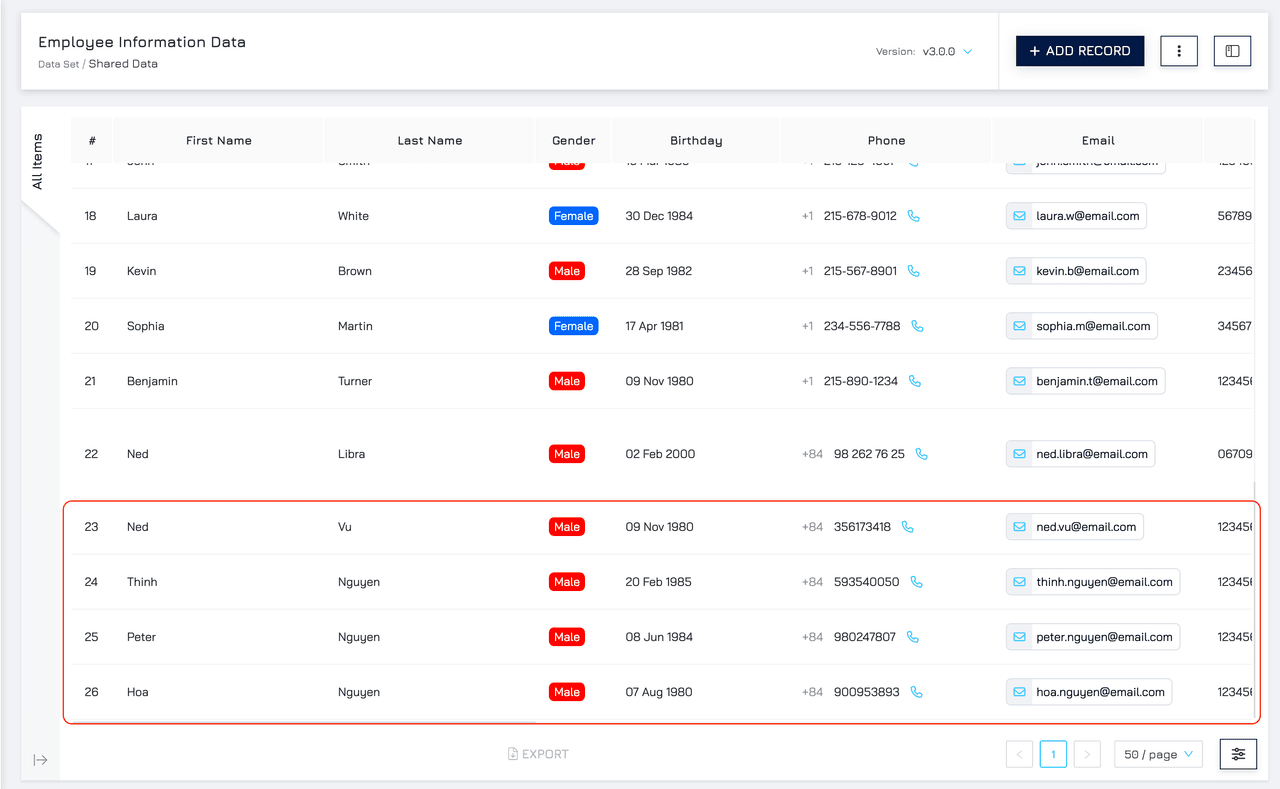
Navigate to the data table view of Employee Information Data .
Click the ellipsis menu (top-right corner) and select Import Data.
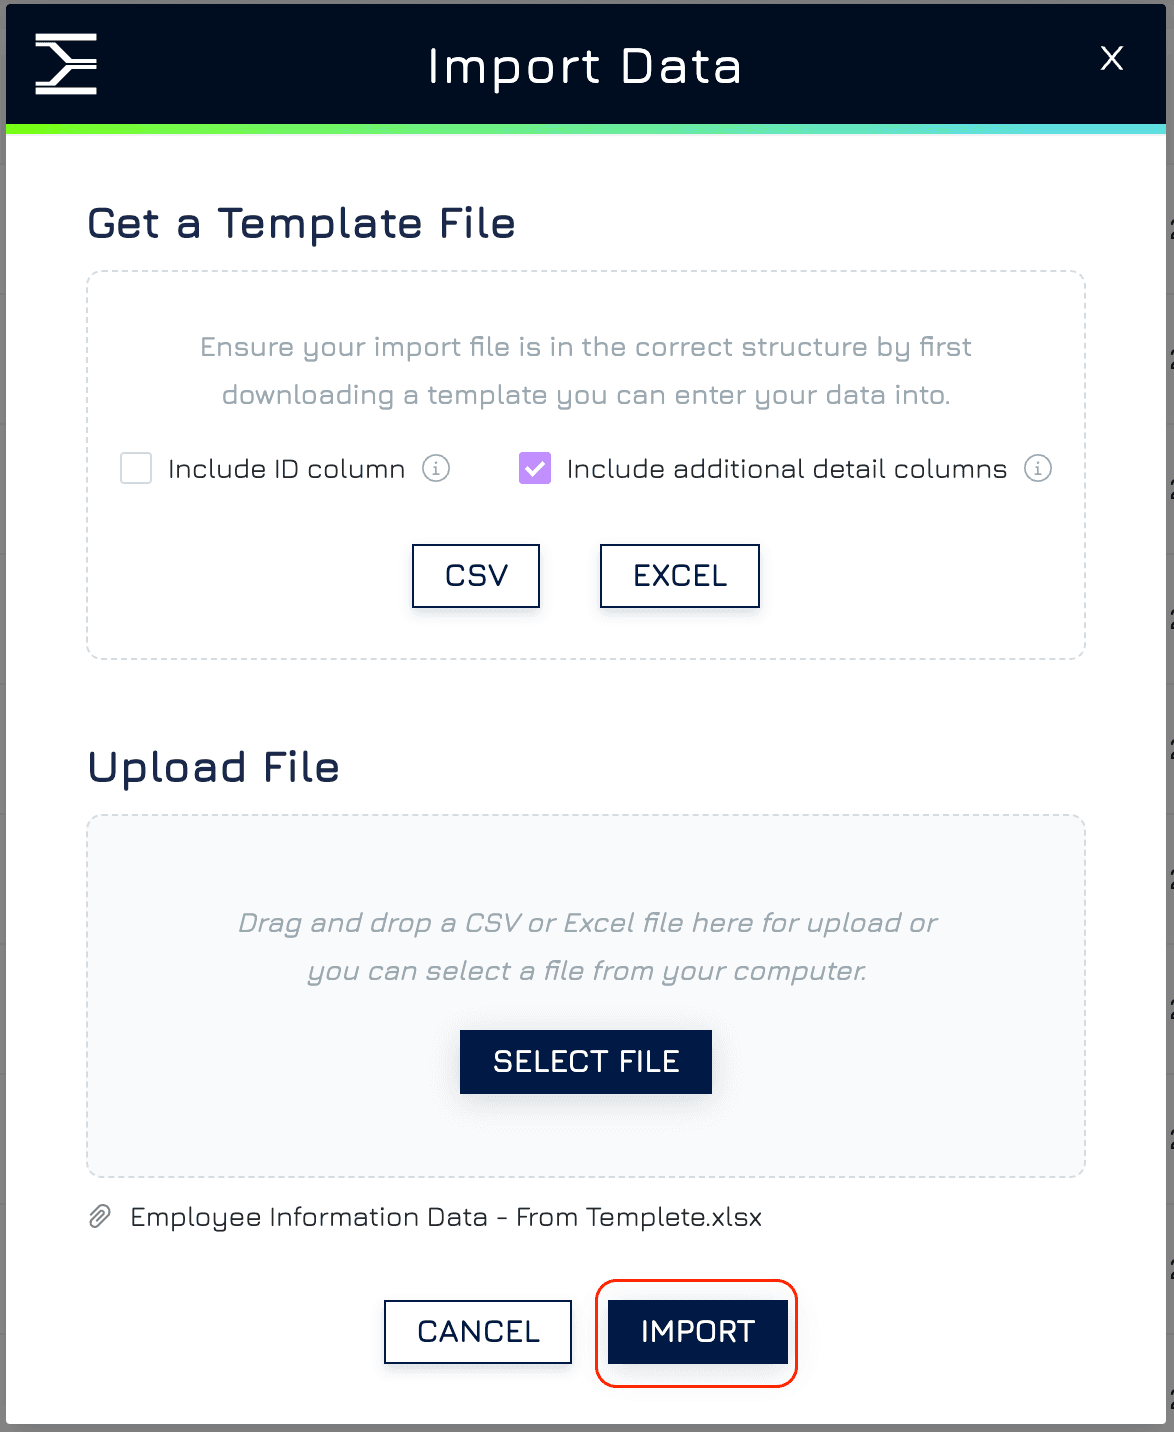
2. Download the Import Template
Select Include additional details columns and download the system-generated template.
3. Prepare Your Data File
Open the downloaded template and enter your data in the correct format.
Ensure all required fields are populated and match the expected data types.
Employee_Information_60bd6a69f6.xlsx
4. Upload and Import
Click Select File, choose your prepared data file, and upload it.
Click Import to process the data.
5. Verify Imported Data
Review the imported records to ensure accuracy.